How to Build an Inventory Management System with Claude Code in Next.js (Full Tutorial 2026)
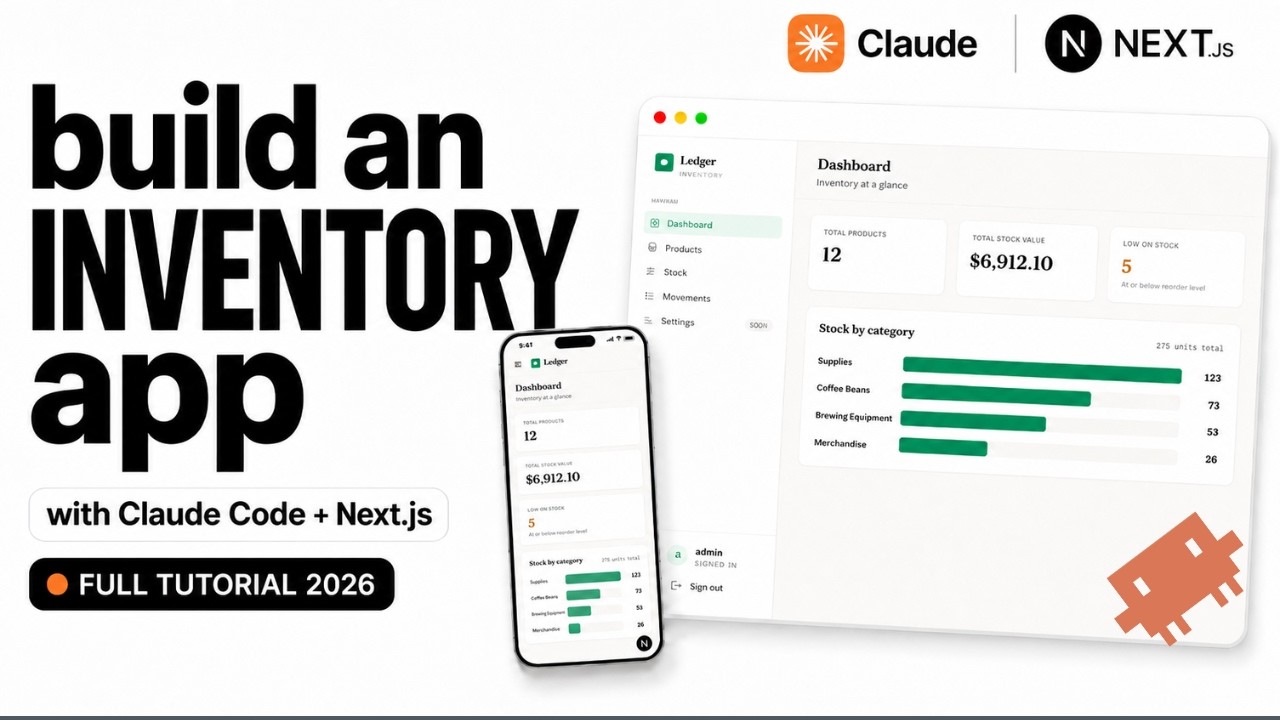
I built a complete inventory management system by talking to Claude Code. A products catalog with low-stock alerts, stock-in and stock-out movements with a history log, and a dashboard with a stock-by-category chart, all behind a login. No template, no boilerplate. This post walks through the whole build, including every prompt and command I used.
The stack is Next.js (App Router), Prisma, Tailwind CSS, and SQLite. Everything runs locally, so you can follow along without setting up a database server.
What We're Building
A real inventory app (the build calls it "Ledger") with five features, each added in its own stage so the app grows step by step:
- Products: list, create, edit, delete (SKU, name, category, quantity, unit price, reorder level)
- Low-stock alerts: any product at or below its reorder level gets flagged automatically
- Stock movements: stock-in and stock-out controls that adjust quantity, with a dated history log
- Dashboard: total products, total stock value, low-stock count, and a stock-by-category chart
- Login: a simple username and password gate that protects the whole app
The approach that makes this work: do not paste one giant prompt. Build in stages. Each stage gives you a working checkpoint, something to test, and it teaches the skill that actually transfers, which is iterating with Claude Code.
Step 1: Set Up the Project
Create an empty folder and open it in VS Code, then start Claude Code in the terminal:
mkdir inventory-claude-code
cd inventory-claude-code
code .
Start Claude Code, then have it scaffold the base Next.js app first so the dependencies install before any feature work:
Please create a Next.js app with bunx in this folder.I use bunx on purpose. It installs dependencies much faster than npm and even pnpm, which saves a lot of time across a build like this.
Step 2: Install the frontend-design Skill
Before the real prompt, install Anthropic's official frontend-design skill. It pushes Claude toward a real, production-grade look instead of the generic "AI slop" design most AI-built UIs ship with. It is an official skill, so you can trust it. Run this inside Claude Code:
/plugin install frontend-design@claude-plugins-officialIf that command does not work, the official marketplace is not added in your Claude Code yet. Add it first, then run the install command again:
/plugin marketplace add anthropics/claude-codeAfter it installs, restart Claude Code (or run /reload-plugins) so the skill is active.
Step 3: Plan Before You Build
Do not fire the prompt straight away. Switch to Plan mode first (hold Shift and tap Tab until you see Plan mode at the bottom), then send your prompt. Claude researches the project, reads the frontend-design skill, asks a couple of clarifying questions (for this build, the visual style and how the create/edit form should feel), and produces a full plan: the Prisma schema, the routes, the components, and the design tokens, all before writing code. Read the plan, and only approve it once you are happy. If something is off, type your changes and Claude revises the plan until it is right. Planning first gives a noticeably higher-quality result than prompting blind.
One note on effort. I started in ultra-code mode (the highest effort). On the stock stage that unlocked Claude Code's multi-agent workflow: it ran an adversarial review with separate review and verify agents over the changes before finishing (four reviewers and fifteen verifiers in my run). It is thorough but token-heavy, so I dropped to medium effort for the later stages to keep things fast. Medium was plenty.
Stage 1: Products and Low-Stock Alerts
Here is the Stage 1 prompt:
Build the foundation of an inventory management system in this Next.js project. For now, only build:
- A clean, modern SaaS dashboard layout with a sidebar (think Linear or Stripe).
- A Products page: list, create, edit, delete (SKU, name, category, quantity, unit price, reorder level).
- Show a clear low-stock badge on any product whose quantity is at or below its reorder level.
- Use Prisma with SQLite. Seed 12 realistic sample products across a few categories, some of them low on stock.
Do not build stock movements, a dashboard, or login yet. We will add those next, one at a time.
Use the frontend-design skill and commit to one cohesive, trustworthy aesthetic.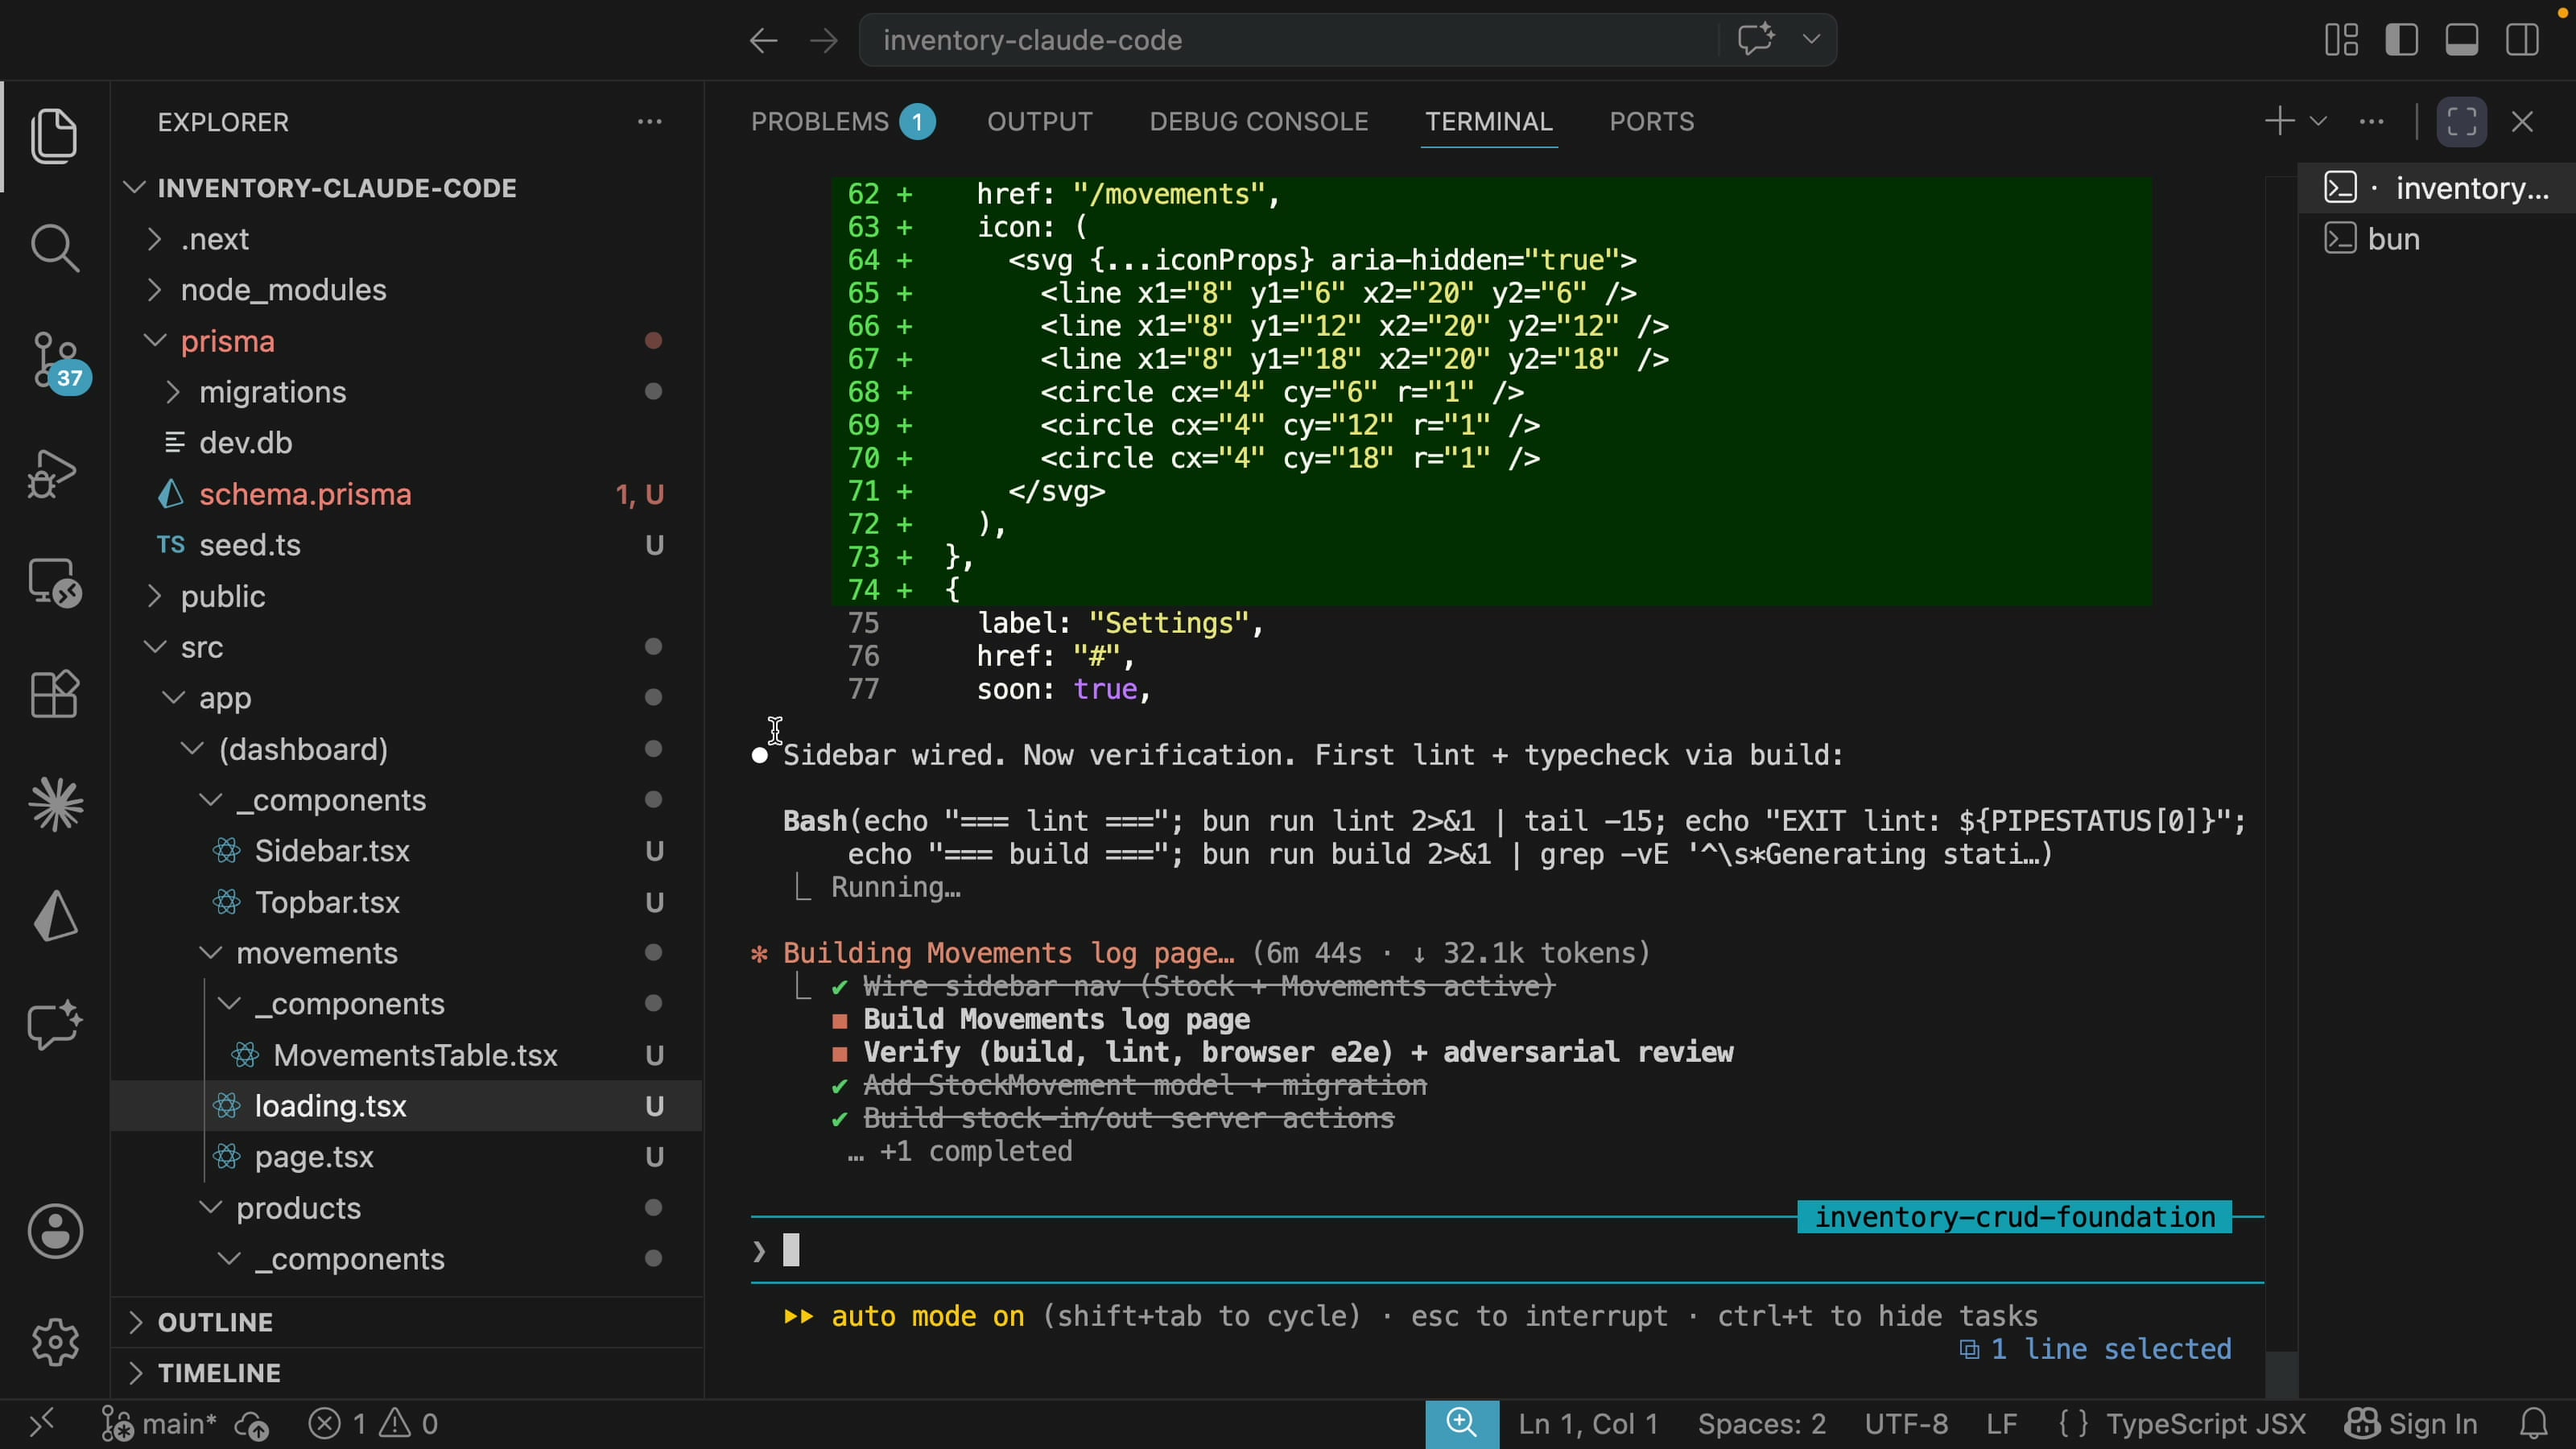
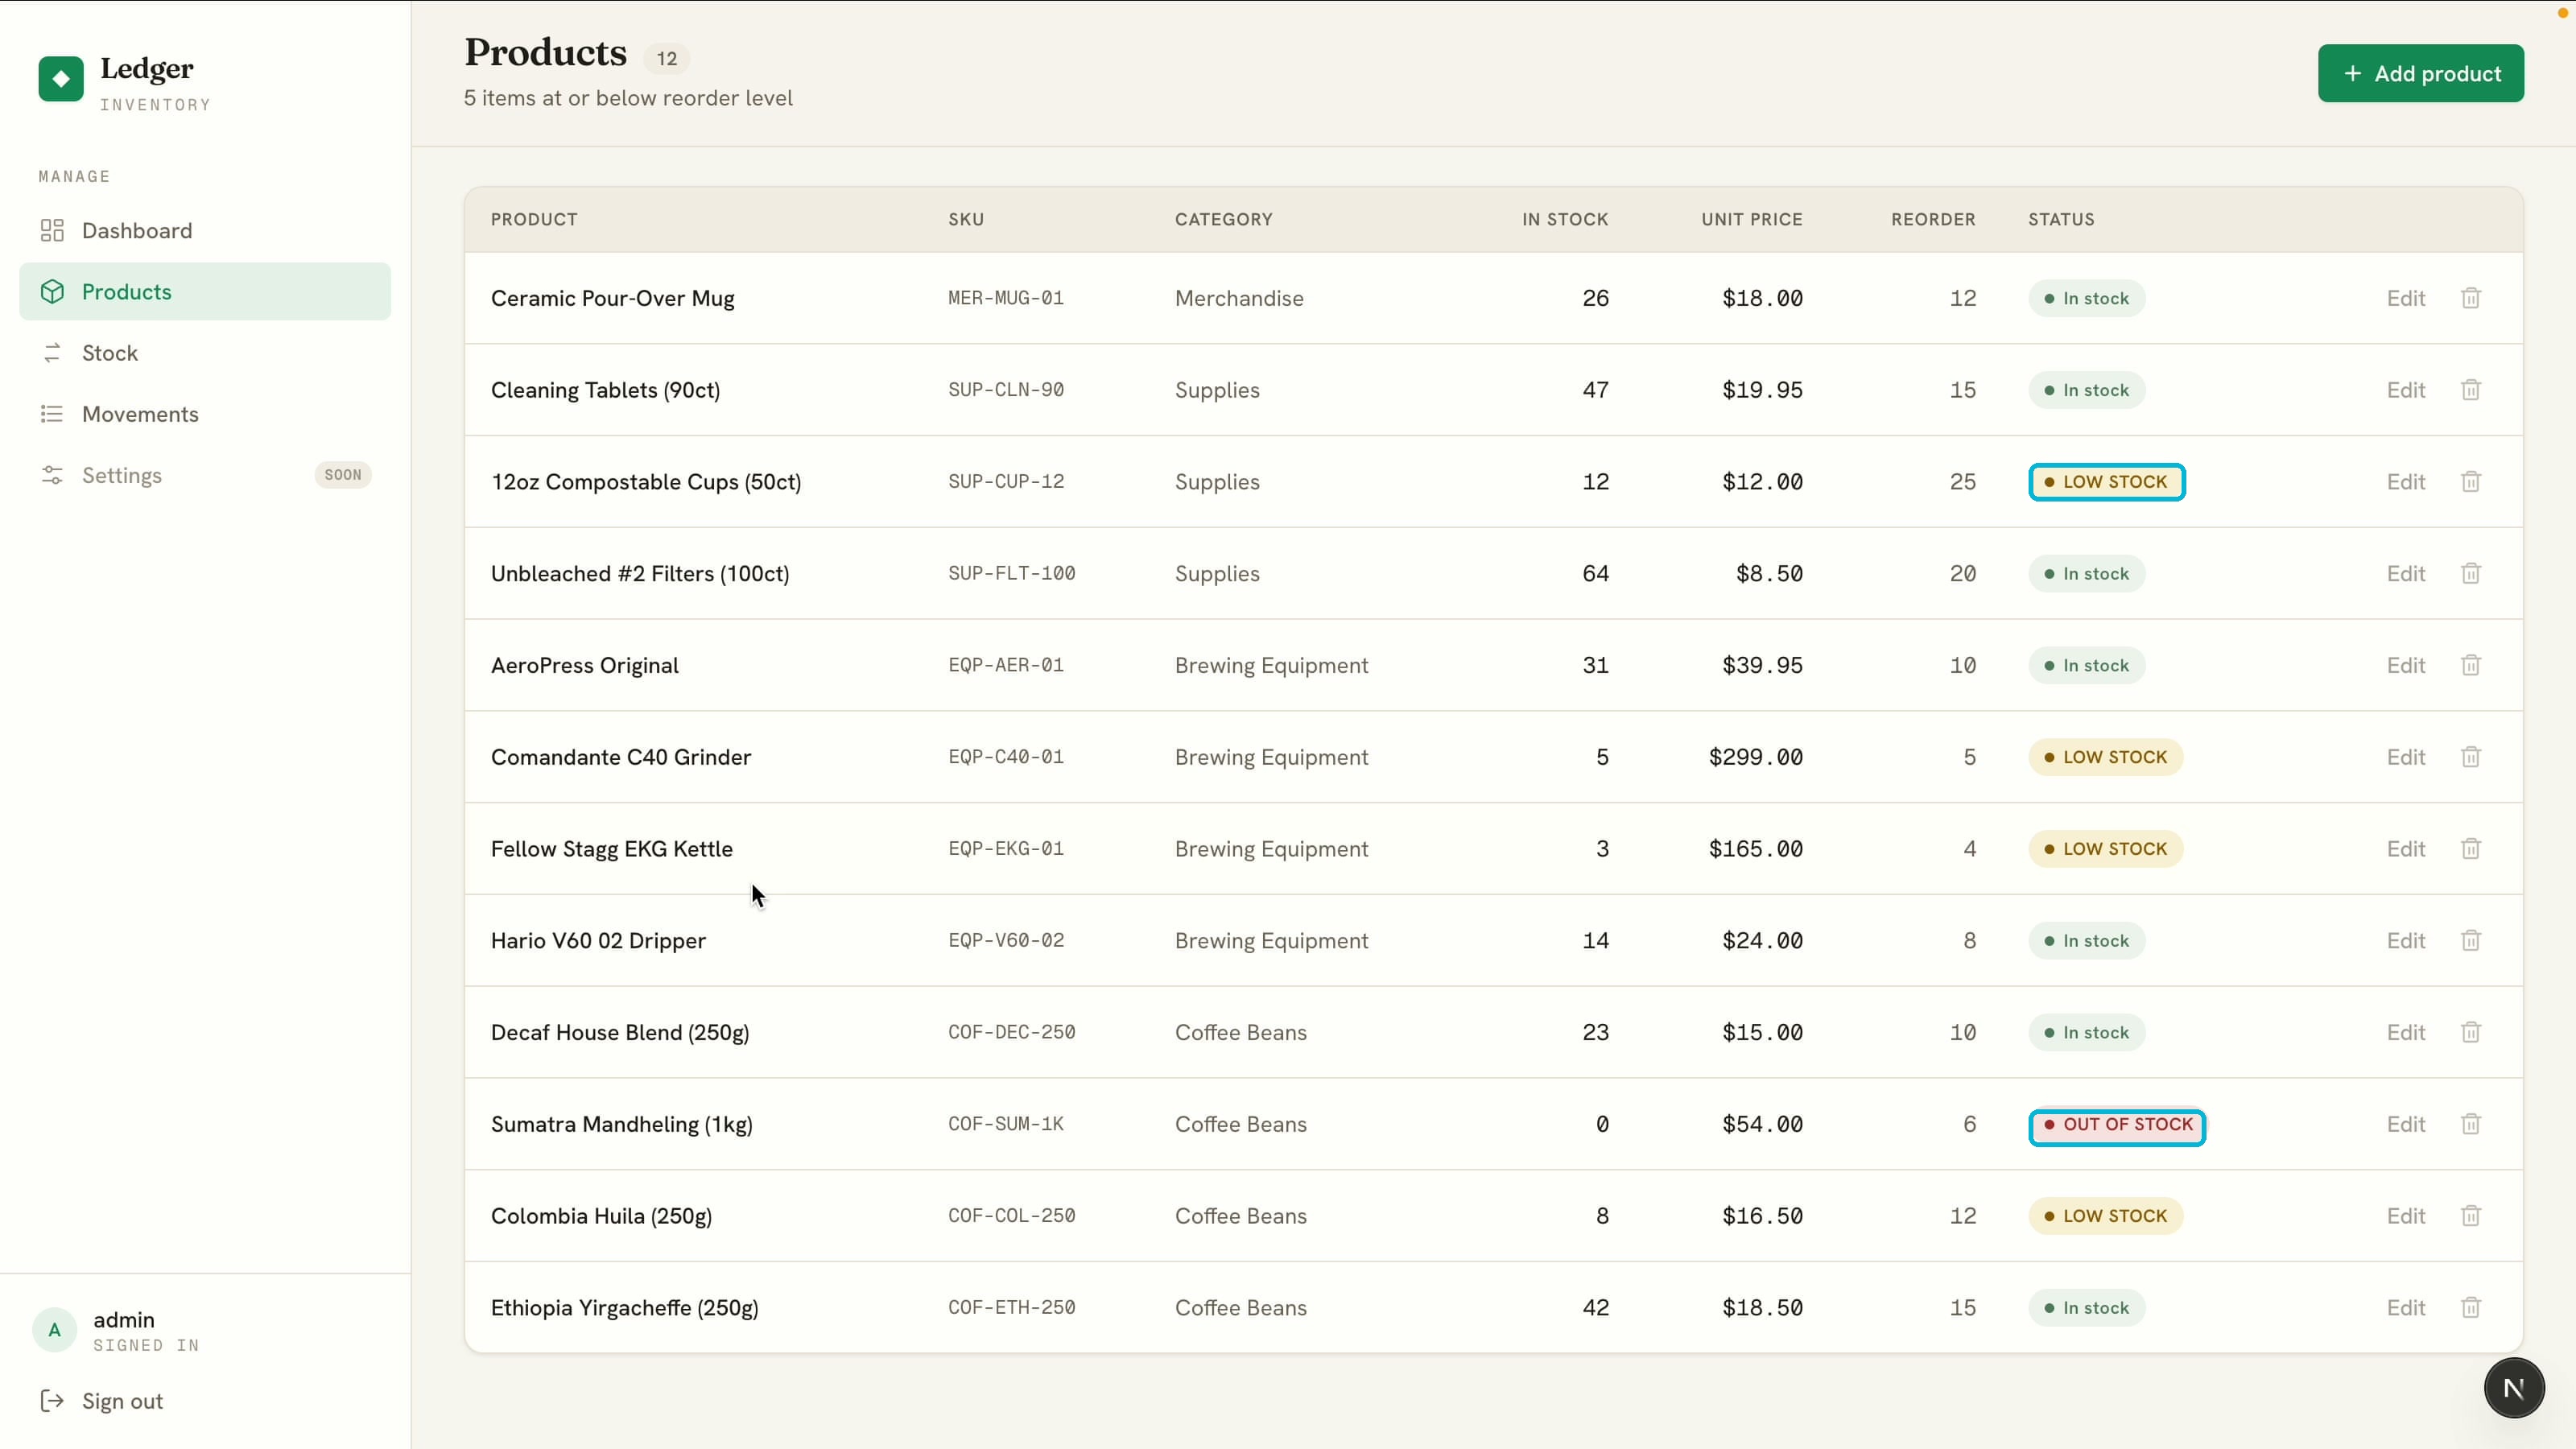
When it finishes, start the dev server and open the app. You get a polished products page with the seeded items. Anything at or below its reorder level is flagged automatically with a low-stock or out-of-stock badge:
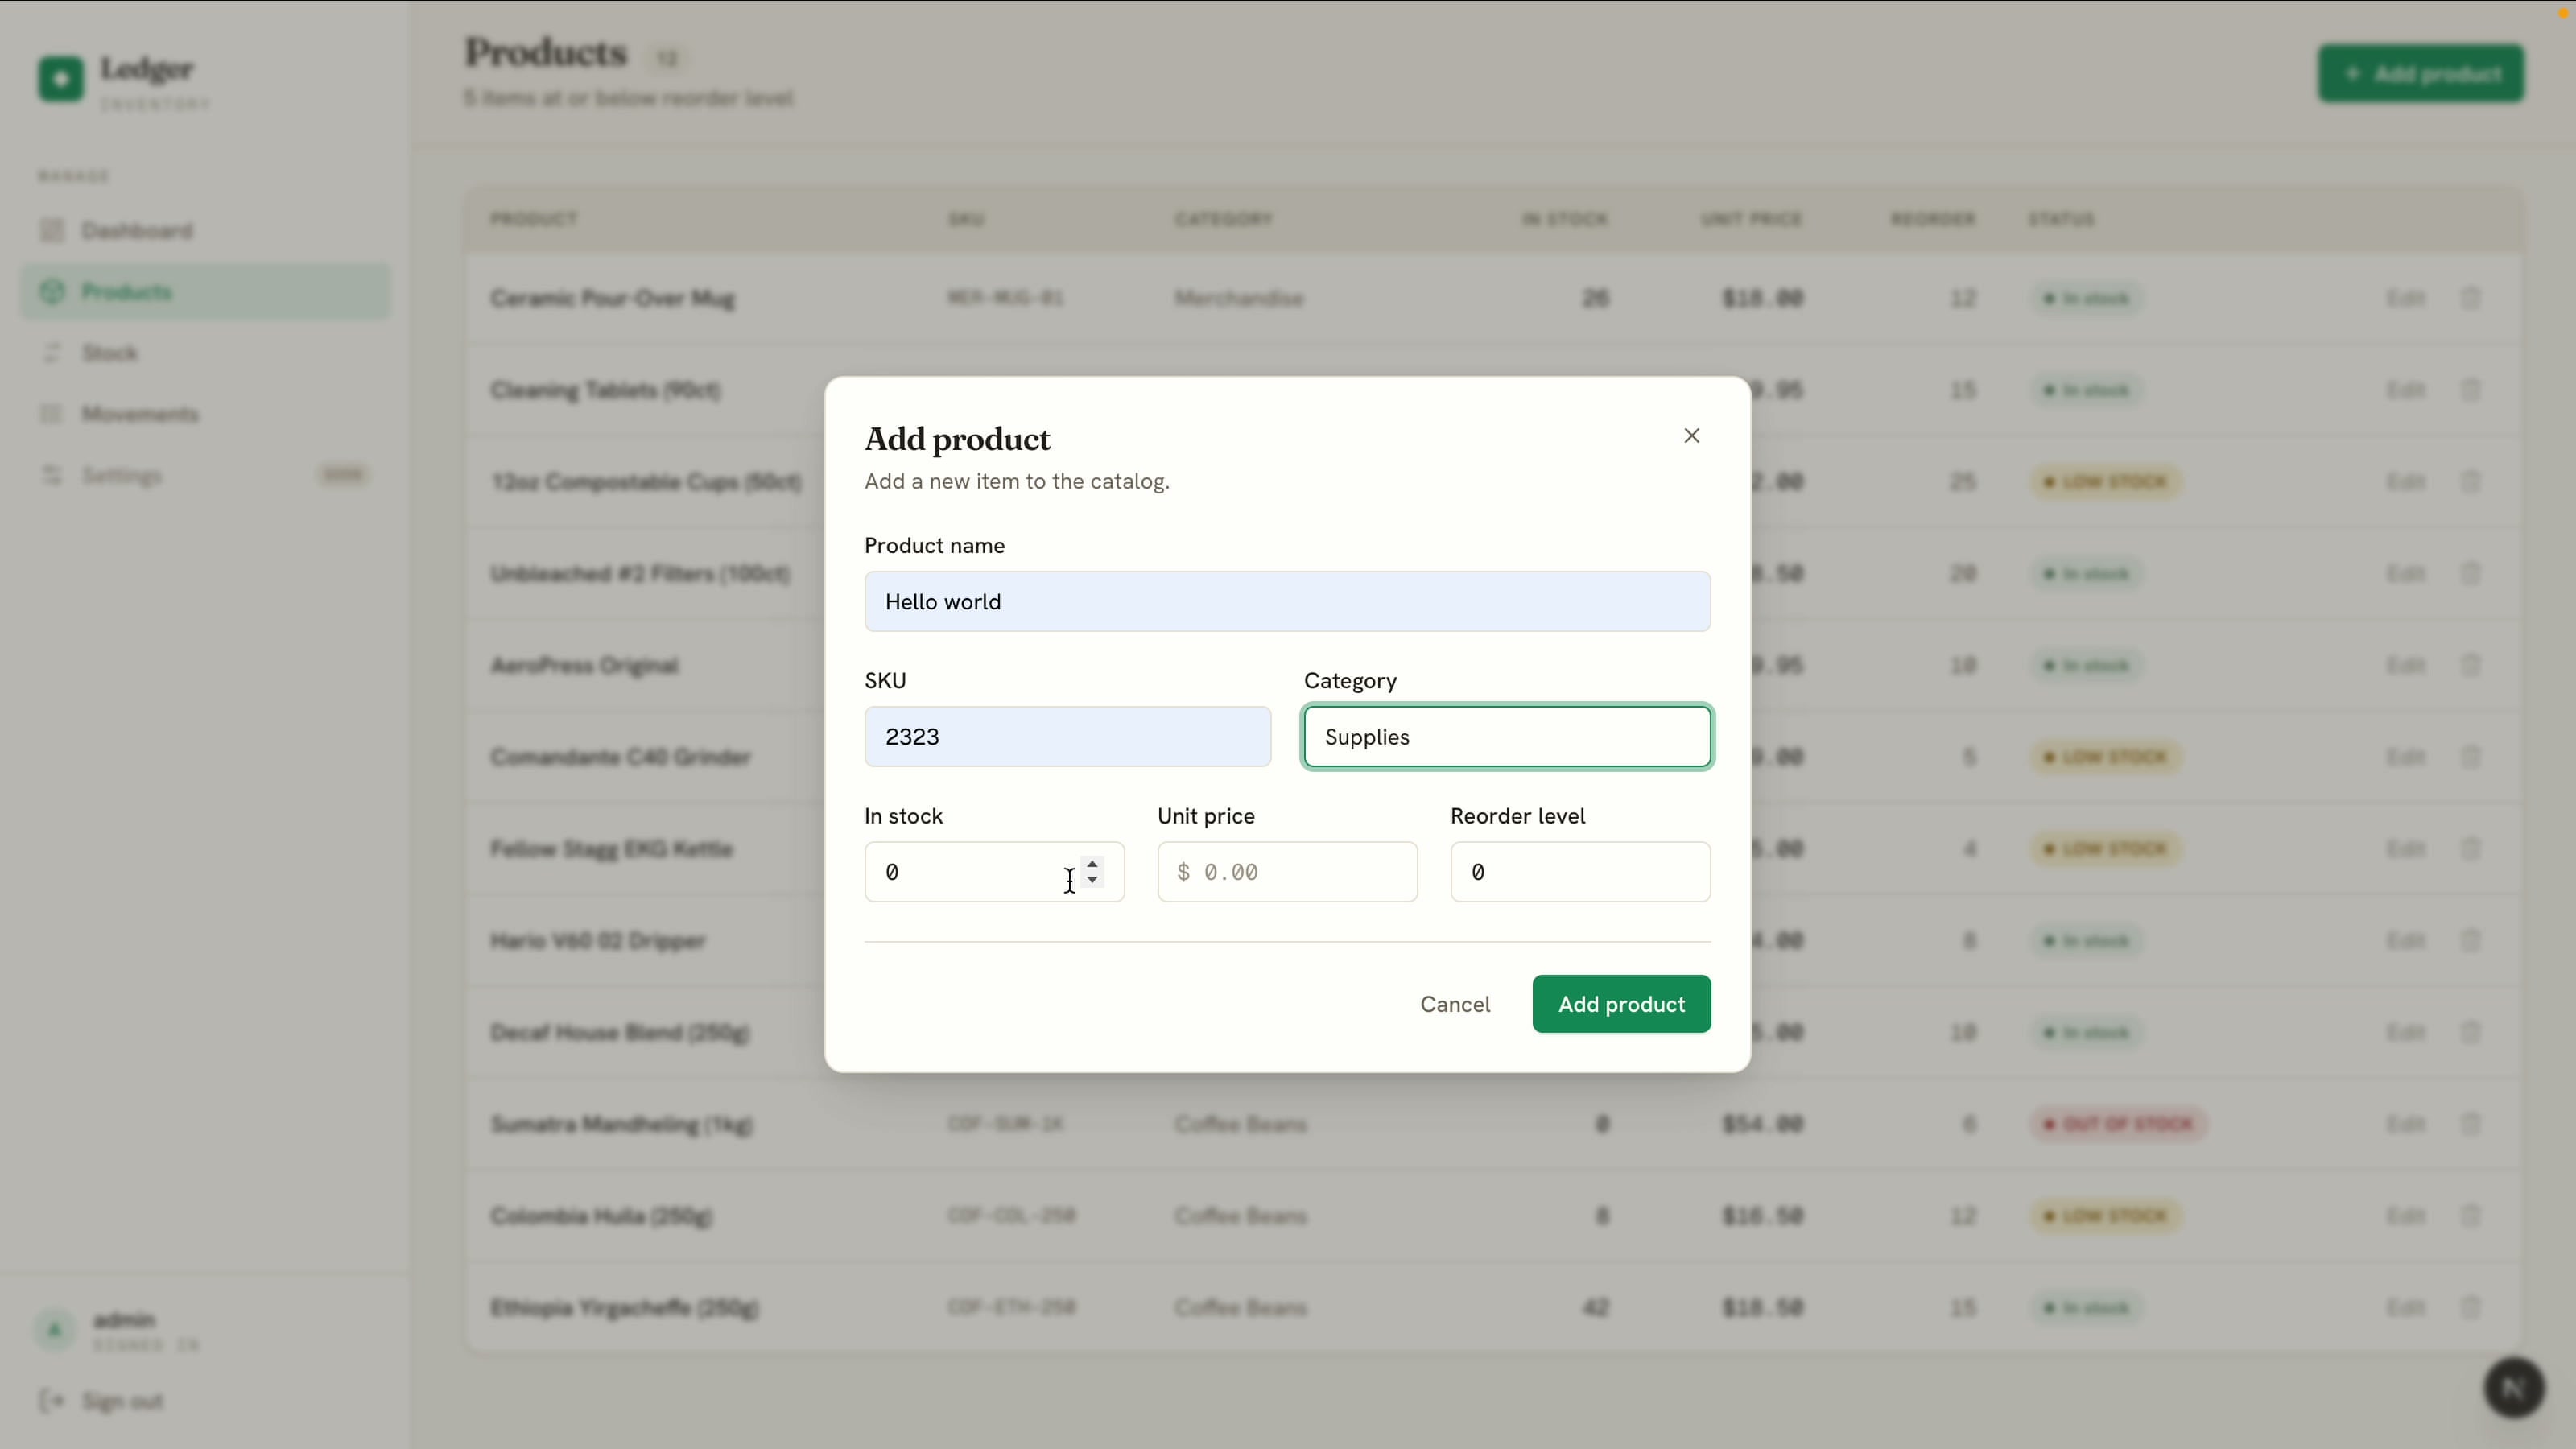
Creating or editing a product opens a centered modal with all the fields from the schema:
Stage 2: Stock Movements
Next, add the stock features as their own prompt:
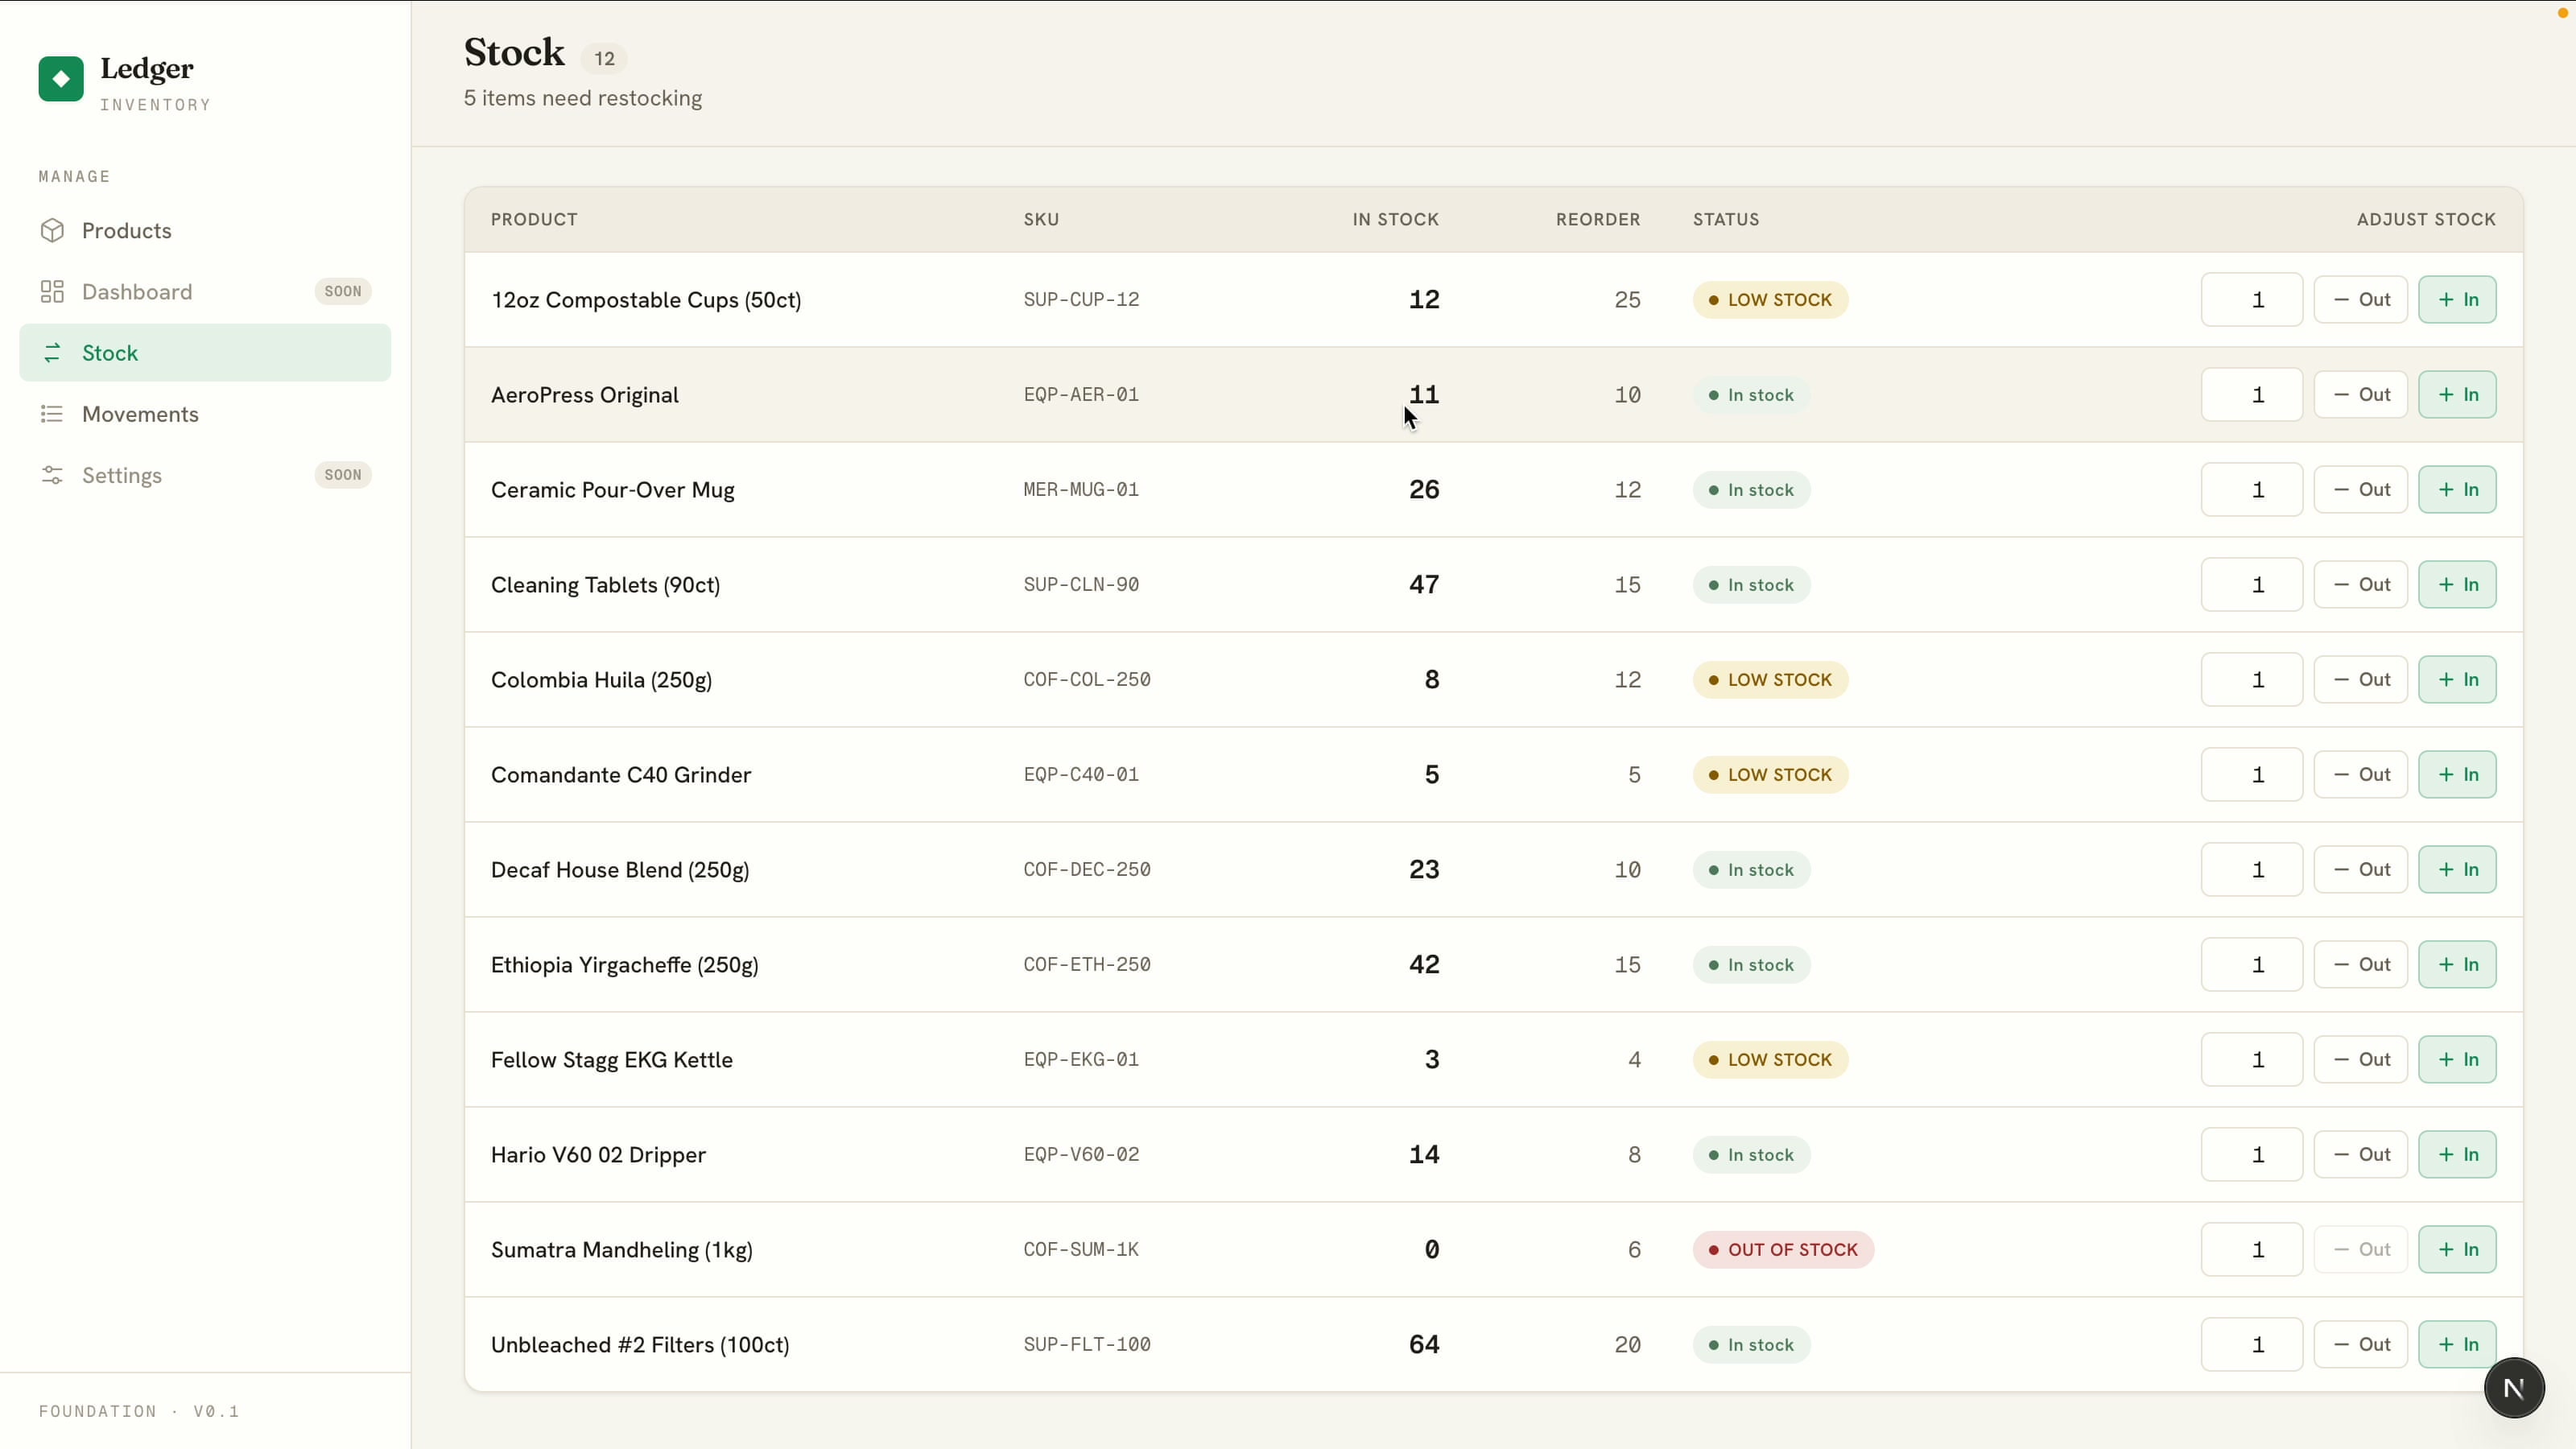
Now add stock management as two new pages in the sidebar. A Stock page that lists all products with quick stock-in and stock-out controls that increase or decrease a product's quantity by the amount I enter. The low-stock badge updates automatically when a product crosses its reorder level. And a Movements page showing a log of every stock change (product, type, amount, resulting quantity, timestamp).The Stock page gives you in and out controls on every product. Adjust a quantity and the low-stock badge flips the moment it crosses the reorder level:
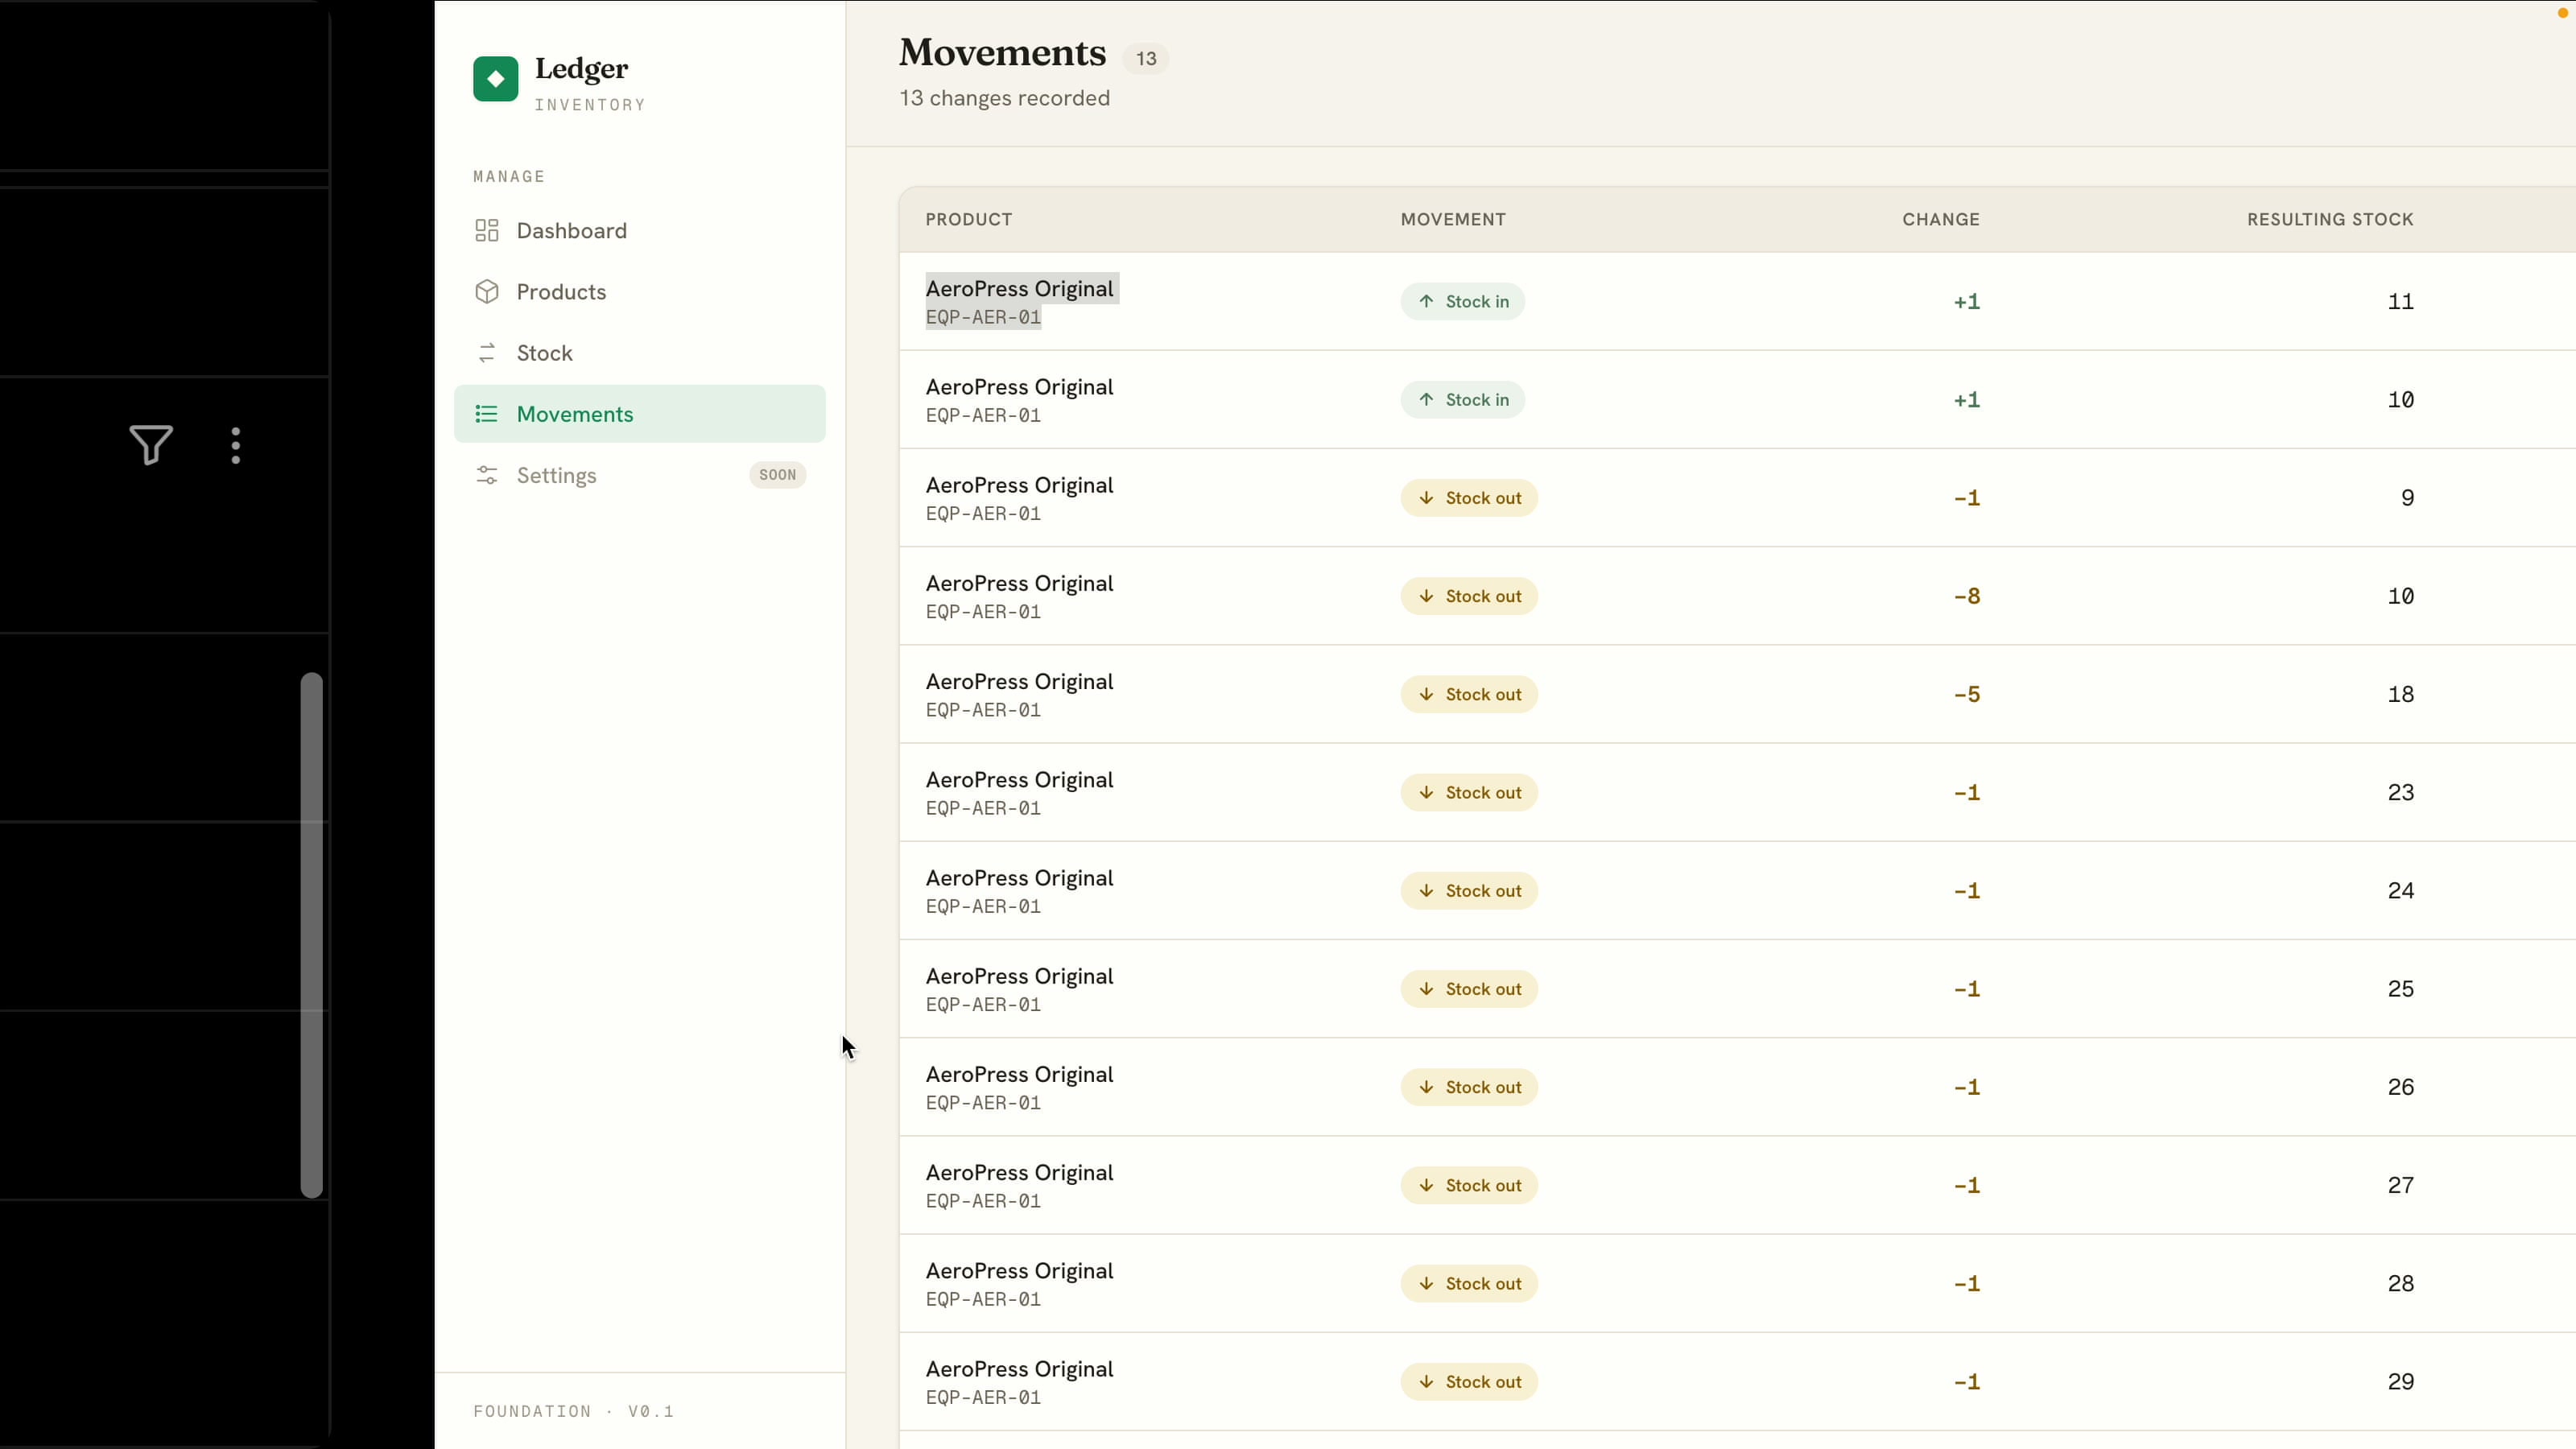
Every adjustment is recorded on the Movements page, a read-only history of what changed and when:
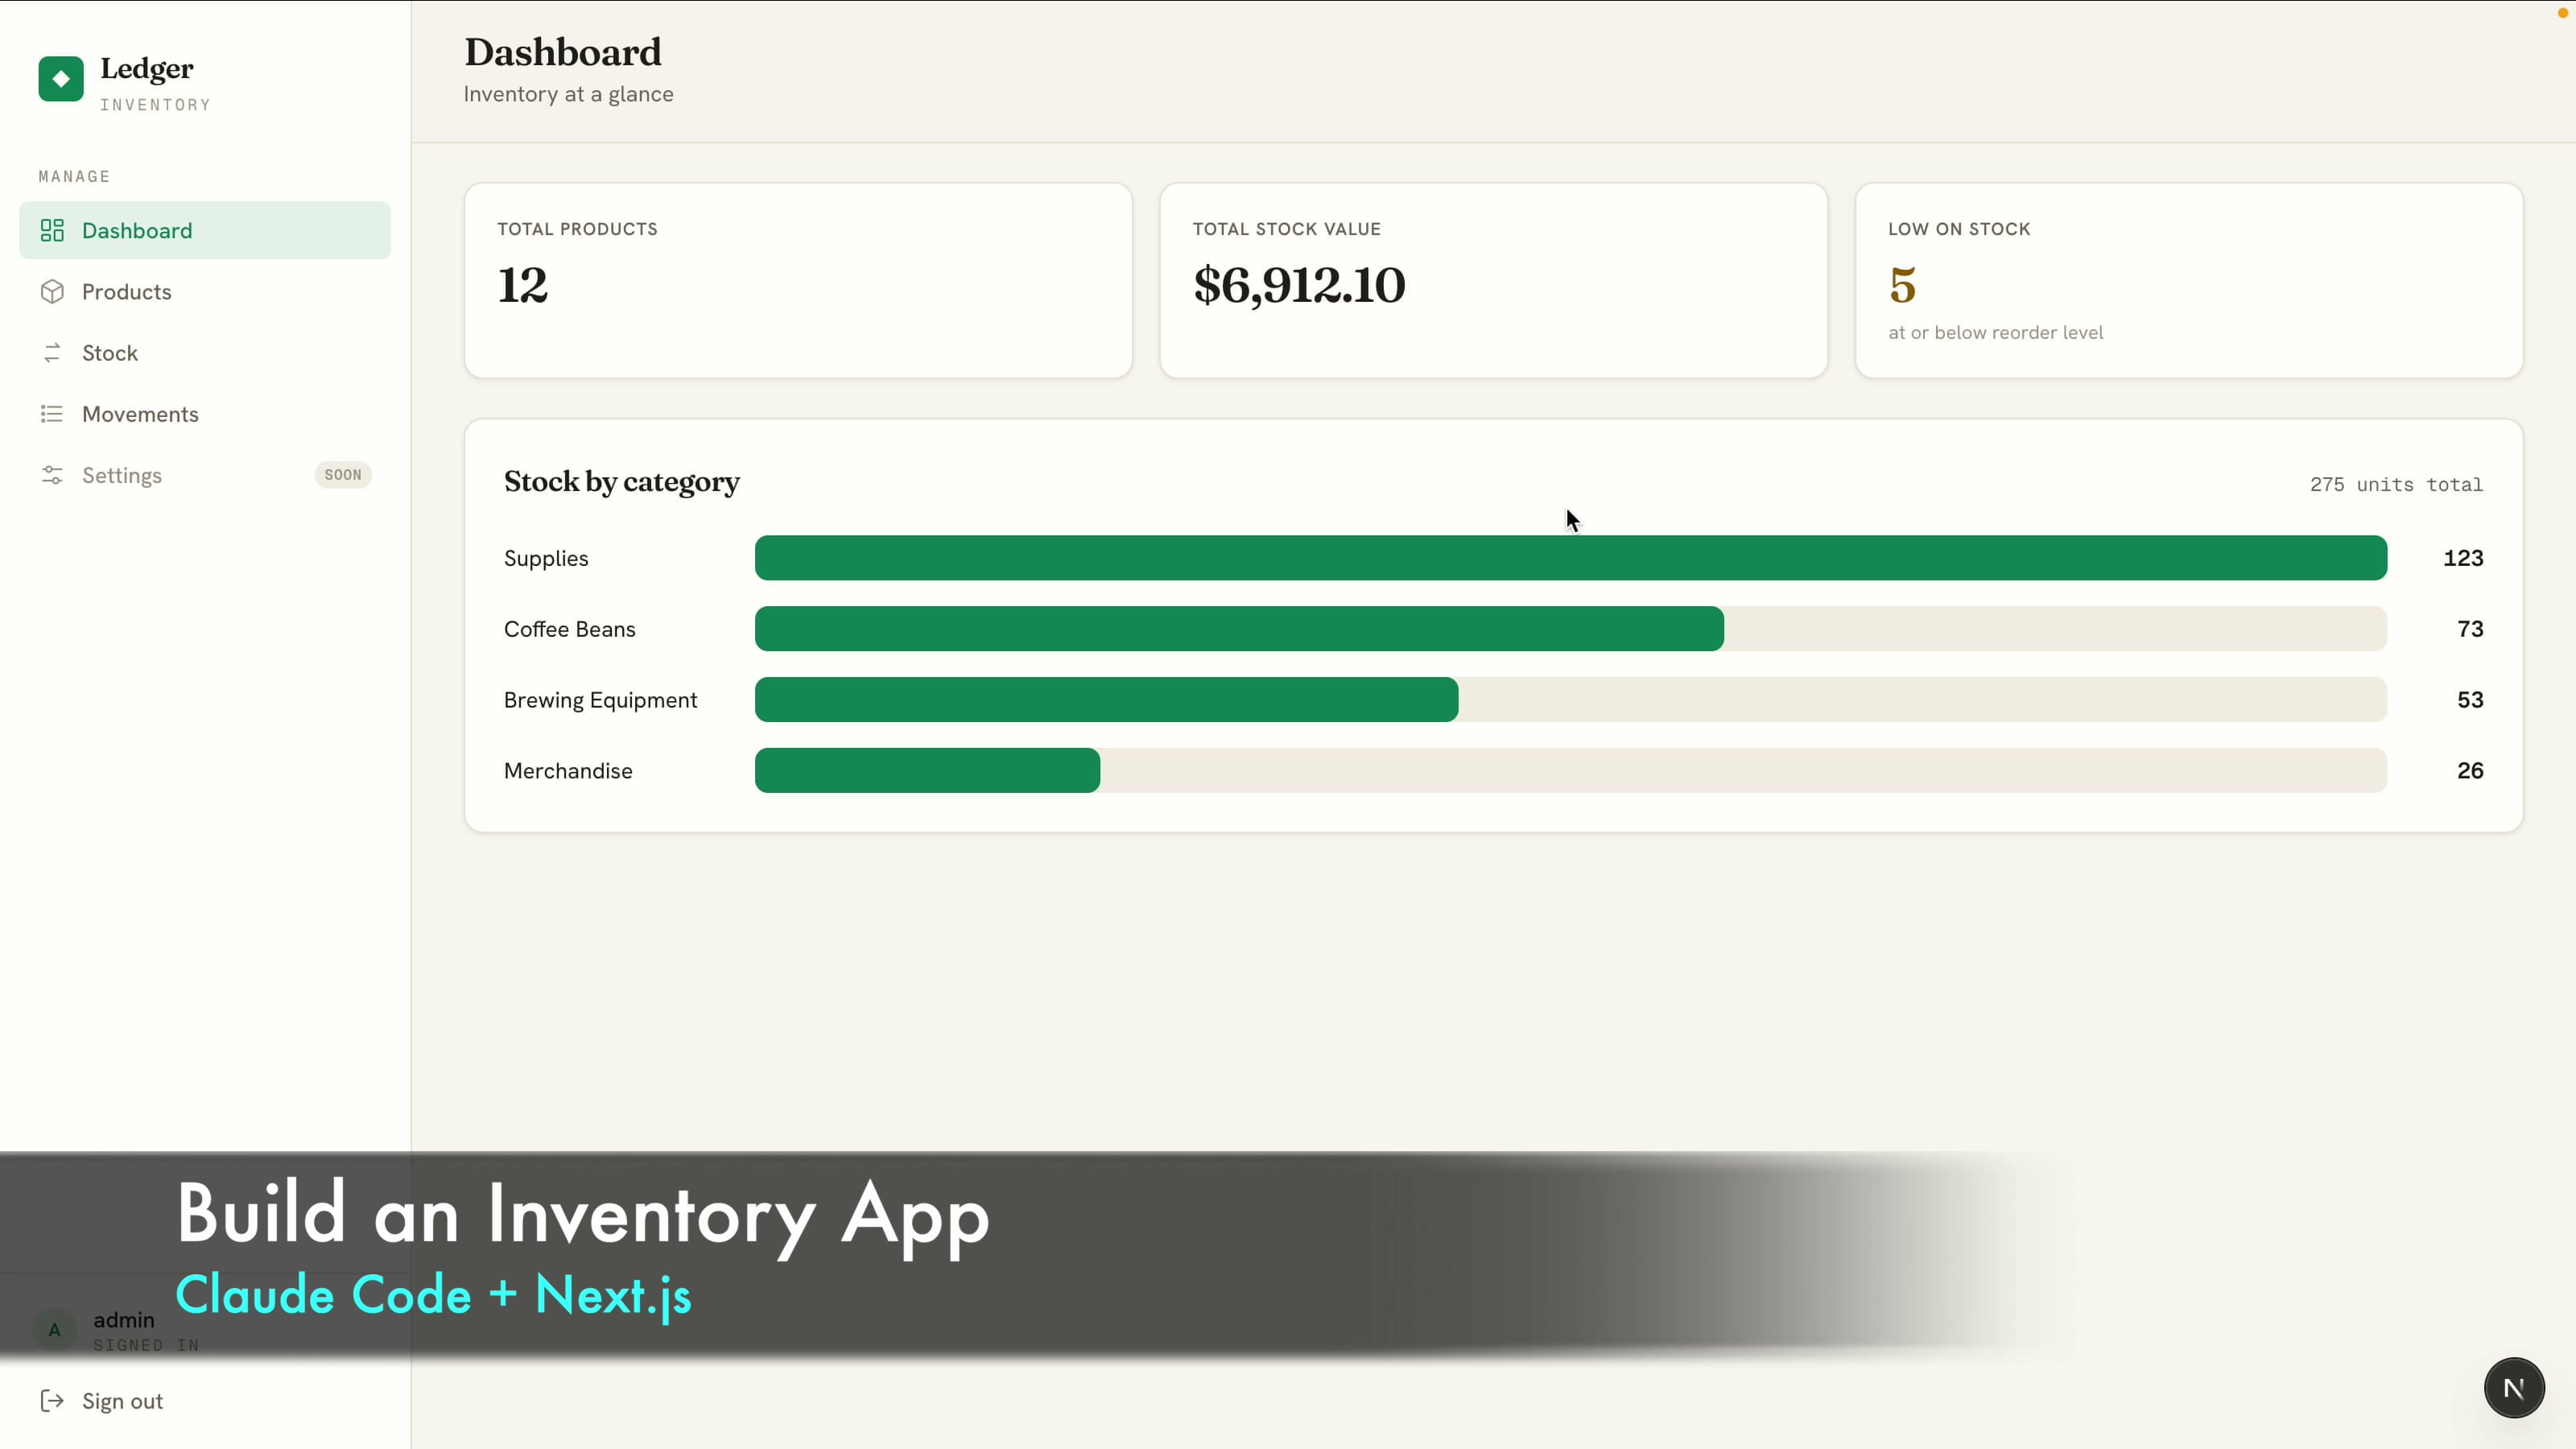
Stage 3: The Dashboard
Now the home page, the at-a-glance view:
Add a dashboard as the home page: total number of products, total stock value (sum of quantity times unit price), a low-stock count, and a bar chart of total stock quantity by category.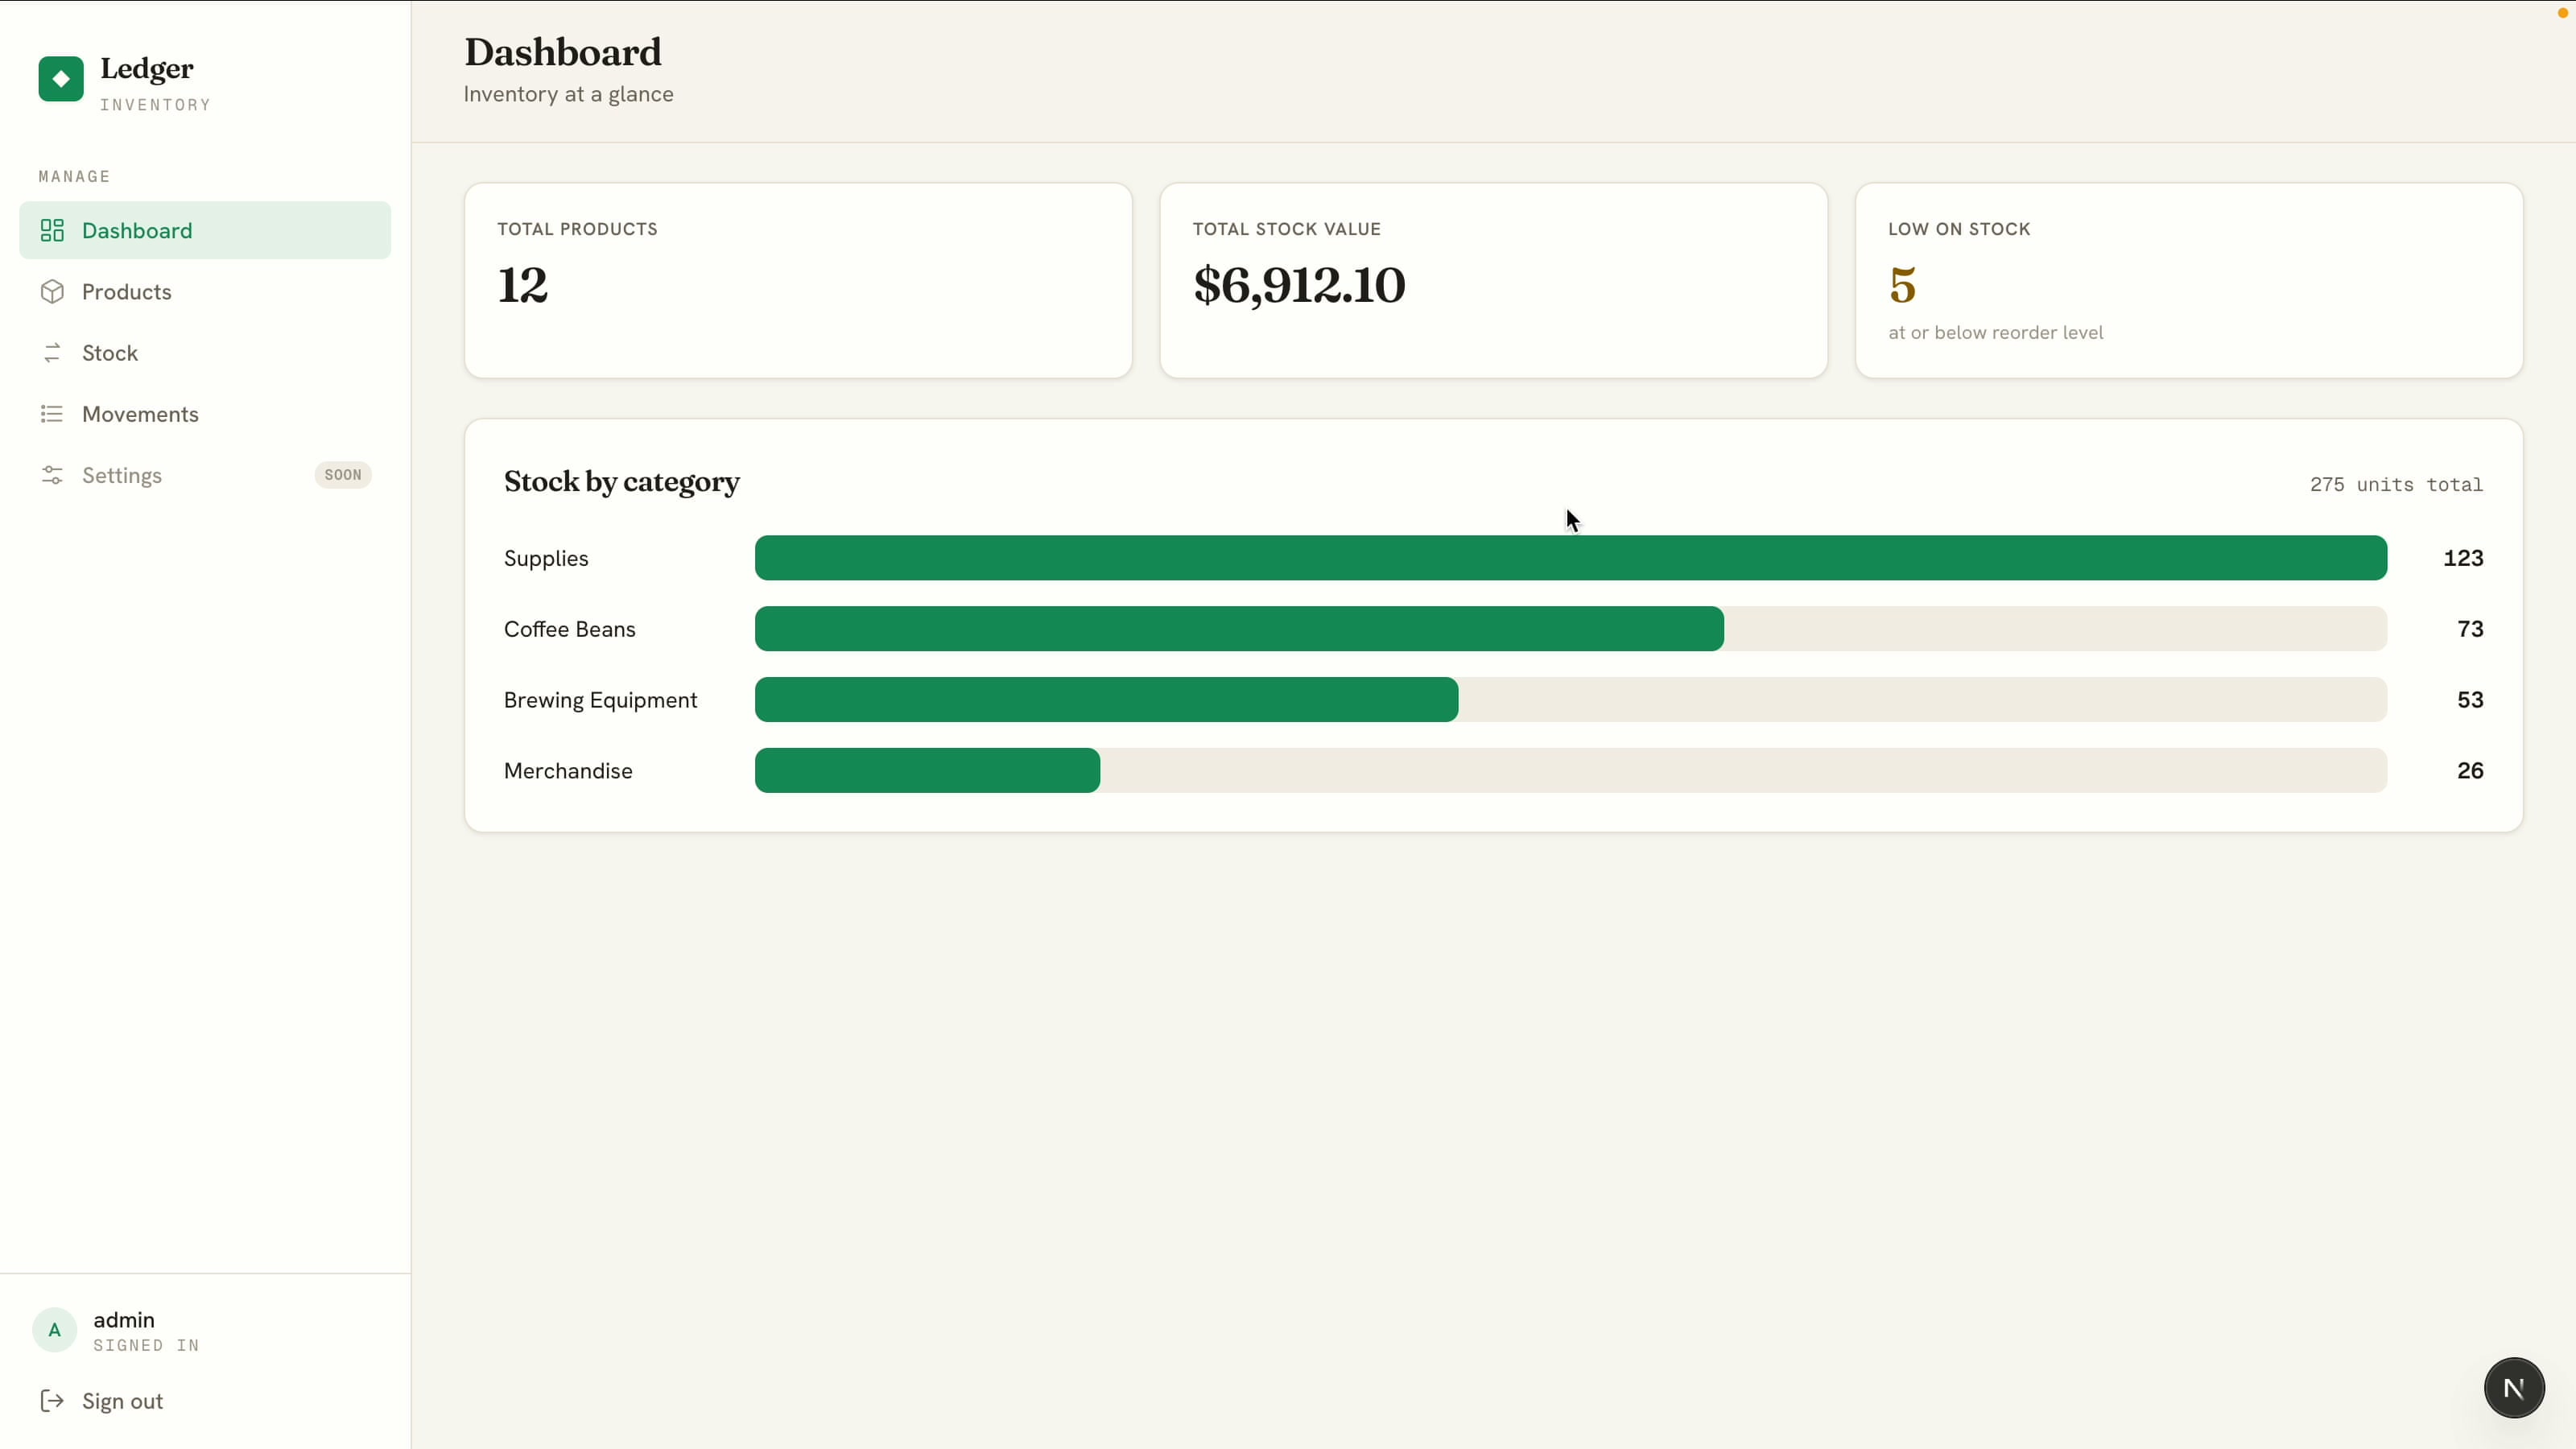
The numbers are live. Add stock to a low item and the low-stock count on the dashboard drops straight away.
Stage 4: Login
Finally, put the whole app behind a simple login:
Finally, add a simple username and password login that protects the whole app. Seed one demo user (username "admin", password "admin123"). No signup, no roles, no password reset. Keep it minimal.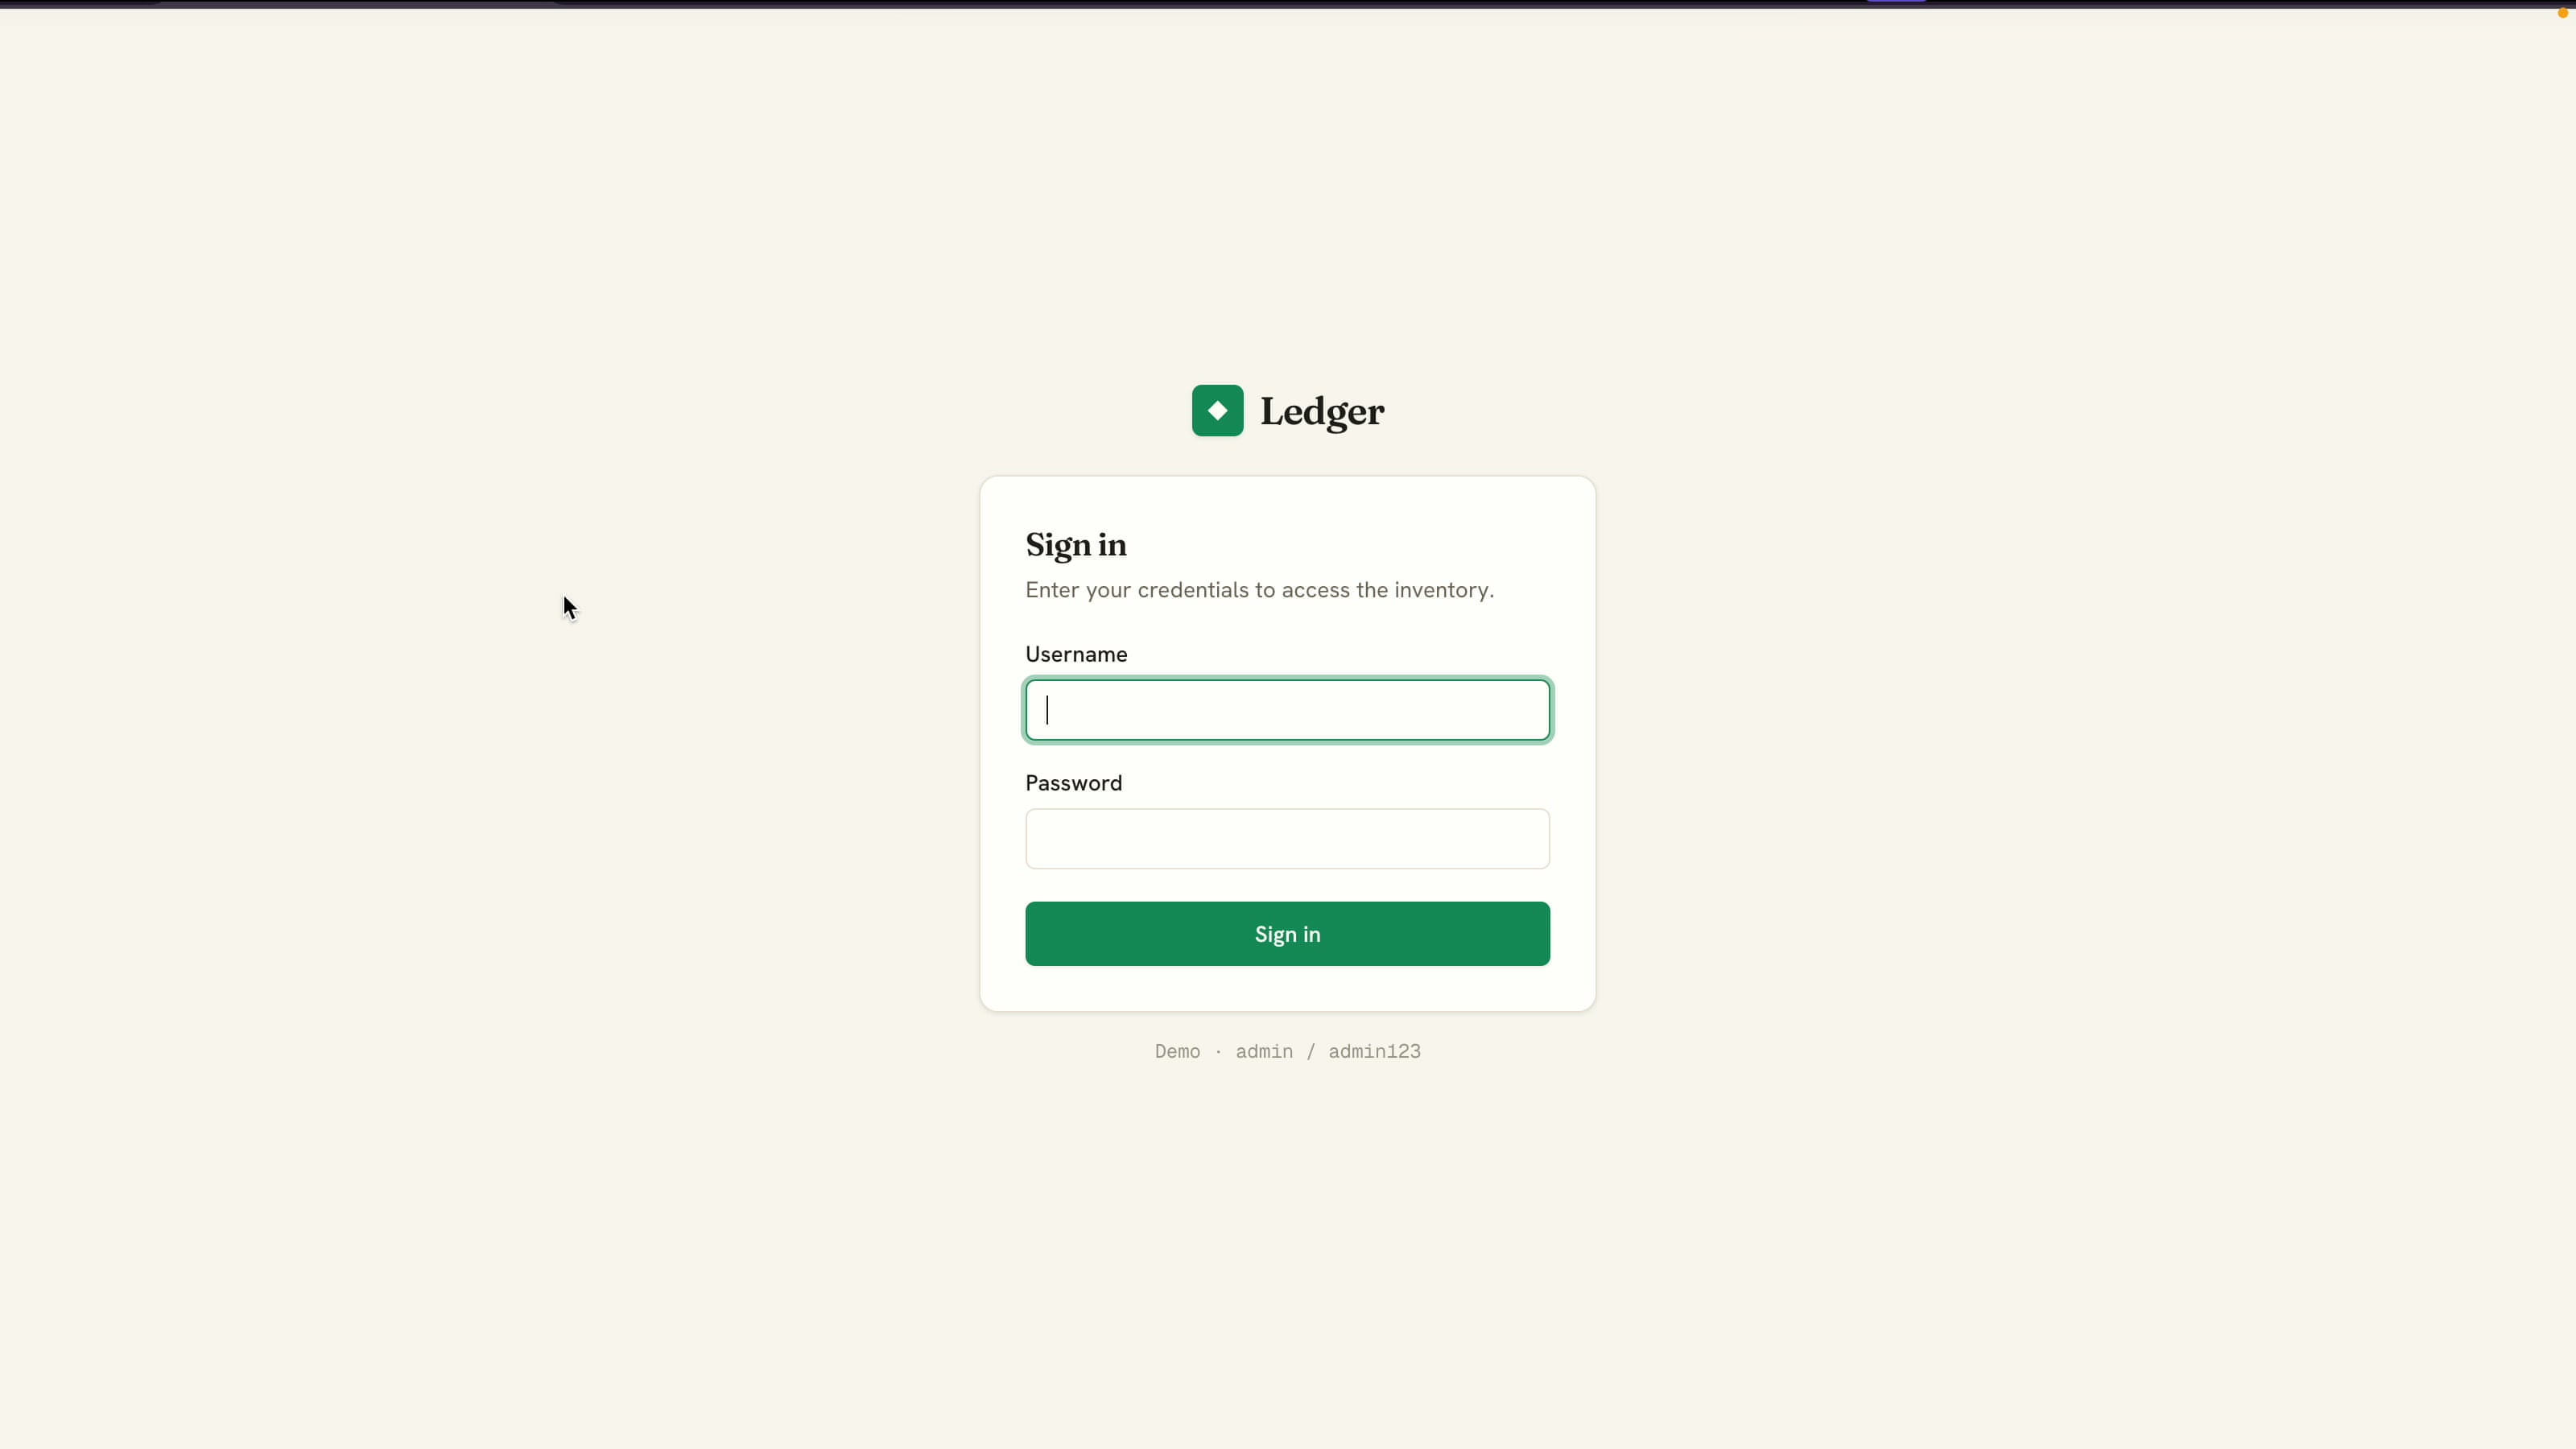
Now every route is protected. Sign in with admin / admin123 and the full app unlocks, with the signed-in user and a sign-out button in the sidebar.
Make It Responsive
The desktop layout looked great, but mobile did not. The fix was simple: take a screenshot of the broken mobile view, drop it into Claude Code, and describe the problem. Claude adjusted the layout, and after a couple of rounds (phone, then iPad) every page worked cleanly on small screens. Giving Claude a screenshot of a visual bug is one of the fastest ways to fix layout issues.
What Made This Work
- Stage the prompts. Five focused prompts beat one giant prompt. The app grows in front of you, and you can test each piece before moving on.
- Plan first. Reviewing Claude's plan before it writes code catches misunderstandings early and raises quality.
- Install the frontend-design skill. One line of direction toward a clean, professional aesthetic gives a polished UI instead of generic defaults.
- Use bunx, not npm. Dependency installs are much faster.
- Screenshot your bugs. For layout problems, a screenshot plus a sentence is faster than describing the issue in words.
Build It Yourself
If you want more build-along tutorials like this one, with real apps, real prompts, and no fluff, subscribe to AyyazTech on YouTube.
Tools I Use
- Hostinger for VPS and hosting: ayyaztech.com/go/hostinger
- Claude and Claude Code, my daily AI pair-programmer: claude.ai
- VS Code, my editor: code.visualstudio.com
Some links above are affiliate links. Using them supports the channel at no extra cost to you.