How to bind data in Angular using API?

Ever wondered how to make your Angular app truly dynamic by seamlessly integrating live data from an API? Today, we'll walk you through how to bind data using Angular's HTTP Client and data binding concepts, so you can make your applications interactive and data-driven. By the end of this tutorial, you'll have a solid understanding of how to make API calls, bind the fetched data, handle user input with search and filter features, and manage errors effectively, providing a more robust and enjoyable experience for your users. Let's dive right in and transform your Angular applications into truly dynamic masterpieces!
Watch the Full Tutorial on YouTube
If you want a deeper, visual walk-through of this process, be sure to watch our YouTube video. We cover each step with detailed visual guides, code snippets, and additional tips to help you get the most out of your Angular projects. Don't forget to hit Subscribe and turn on notifications to stay updated with our latest content and become a pro in web development!
What We Will Cover
- Introduction to Data Binding in Angular
- Setting Up Your Angular Environment
- Making API Calls Using Angular's HTTP Client
- Binding API Data to Components
- Real-Time Search and Filtering
- Error Handling & Optimizing API Requests
By following along with this comprehensive guide, you'll understand both the foundational and advanced concepts necessary to fully integrate APIs into your Angular applications.
1. Introduction to Data Binding in Angular
Angular's data binding is the bridge between your TypeScript code and HTML view, allowing for interactive, dynamic web applications. Data binding in Angular allows you to efficiently connect your logic with the user interface, updating data in real-time without manually manipulating the DOM.
There are four types of data binding in Angular:
- Interpolation: Displays component data in HTML templates using
{{ }}(double curly braces). This one-way binding mechanism allows data to flow from the component to the view, making it useful for showing dynamic data in a readable way. - Property Binding: Sets properties of HTML elements using
[property]="value". Property binding is essential for setting DOM properties dynamically, such as setting an element’ssrc,disabled, or any other attribute. - Event Binding: Responds to user actions such as clicks by binding events with
(event)="handler()". With event binding, you can interact with users’ inputs, creating event-driven applications that are more responsive and user-friendly. - Two-Way Binding: Combines property and event binding using
[(ngModel)]="value". Two-way binding keeps user input in sync with the component, providing a smooth and dynamic way to handle forms and input fields.
These binding techniques play a crucial role when integrating APIs to ensure smooth data flow between your Angular application and its users. Whether it’s showing data retrieved from an API or updating the user interface based on user input, mastering these types of data binding will significantly elevate your development skills.
2. Setting Up Your Angular Environment
To start, you'll need Node.js and the Angular CLI. Node.js provides the runtime for building Angular applications, while the Angular CLI is a command-line interface that helps you create, manage, and develop Angular projects easily.
Run the following command to install Angular CLI globally:
npm install -g @angular/cliTo create a new Angular project, use the following command:
ng new project-nameFollow the prompts to set up your project. For this tutorial, you can skip routing and use your preferred styling option (CSS, SCSS, etc.). Once the setup is complete, navigate to the project directory and run your Angular app with:
ng serve -oThis command will build your project and open it in the browser automatically, allowing you to see your changes in real-time. This quick feedback cycle is key to an efficient development workflow.
Now, let's set up Angular's HTTP Client, which will be crucial for making our application dynamic.
3. Making API Calls Using Angular's HTTP Client
Angular's HTTP Client allows us to interact with APIs, making it easy to fetch and display data in your application. First, import the HttpClientModule into your application.
- If using App Modules:
- Add
HttpClientModulein yourapp.module.tsby including it in the imports array like this:
- Add
@NgModule({
  imports: [
    BrowserModule,
    // Remove the module
    ...
  ],
  declarations: [
    AppComponent,
    ...
 ],
 providers: [provideHttpClient()] // add it here
 bootstrap: [ AppComponent ]
})
export class AppModule {} - If using Standalone Components (Angular 17+):
- Add the HTTP client to the providers in
app.config.ts:
- Add the HTTP client to the providers in
import { ApplicationConfig } from '@angular/core';
import { provideRouter } from '@angular/router';

import { provideHttpClient } from '@angular/common/http';
import { routes } from './app.routes';

export const appConfig: ApplicationConfig = {
  providers: [
    provideRouter(routes),
    provideHttpClient()
  ],
};
Using Angular's HTTP client provides us with powerful tools to make network requests, including GET, POST, PUT, and DELETE, which cover the main CRUD operations.
Next, inject the HttpClient into your component using Angular's inject function to access its methods:
import { HttpClient } from '@angular/common/http';
import { inject } from '@angular/core';

export class AppComponent {
  private http = inject(HttpClient);
}
This approach allows your Angular application to interact with external data sources seamlessly, updating your application’s state in real-time.
4. Binding API Data to Components
With the HTTP client now properly set up, we can use it to fetch data and bind that data to our Angular components. Below is an example of how to fetch user data from an API and display it using Angular's interpolation and structural directives:
 fetchData() {
  this.http.get('https://jsonplaceholder.typicode.com/users')
    .subscribe((data) => {
      this.items = data;
    });
}
Add above code in your component typescript class.
To bind this data to your HTML, use Angular's interpolation and *ngFor directive:
<ul>
  <li *ngFor="let item of items">
    {{ item.name }}
  </li>
</ul>
The *ngFor directive creates a list item (<li>) for each element in the items array, displaying the user names dynamically.

This binding allows for seamless integration of data retrieved from an API into your user interface, offering an interactive experience for your users.
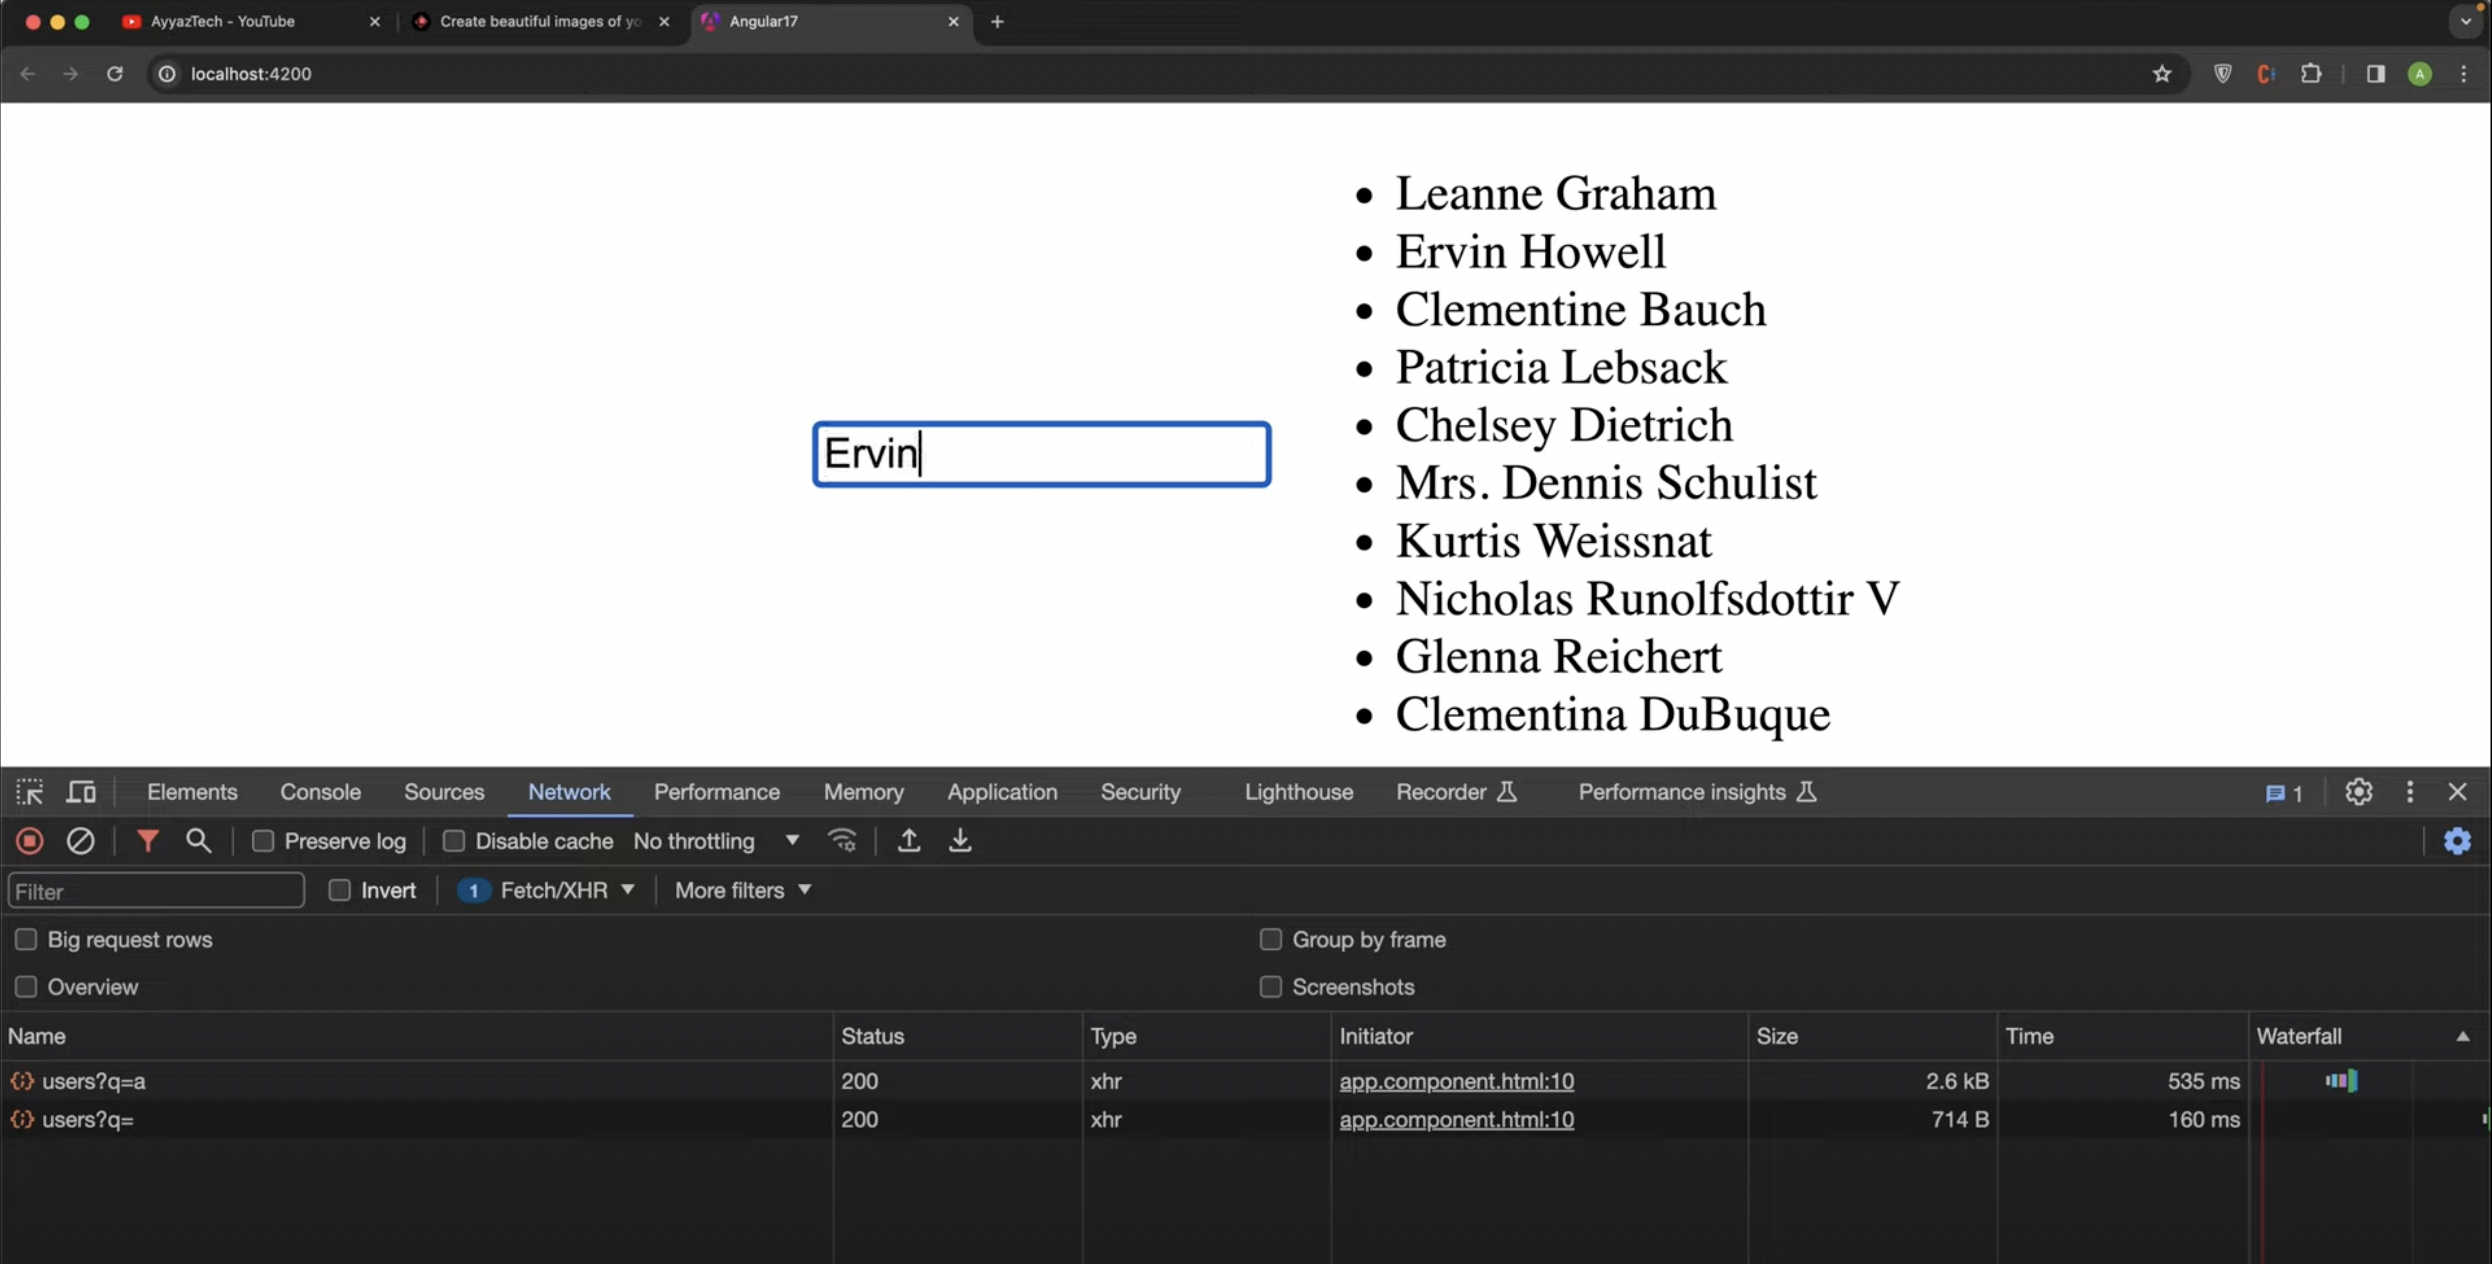
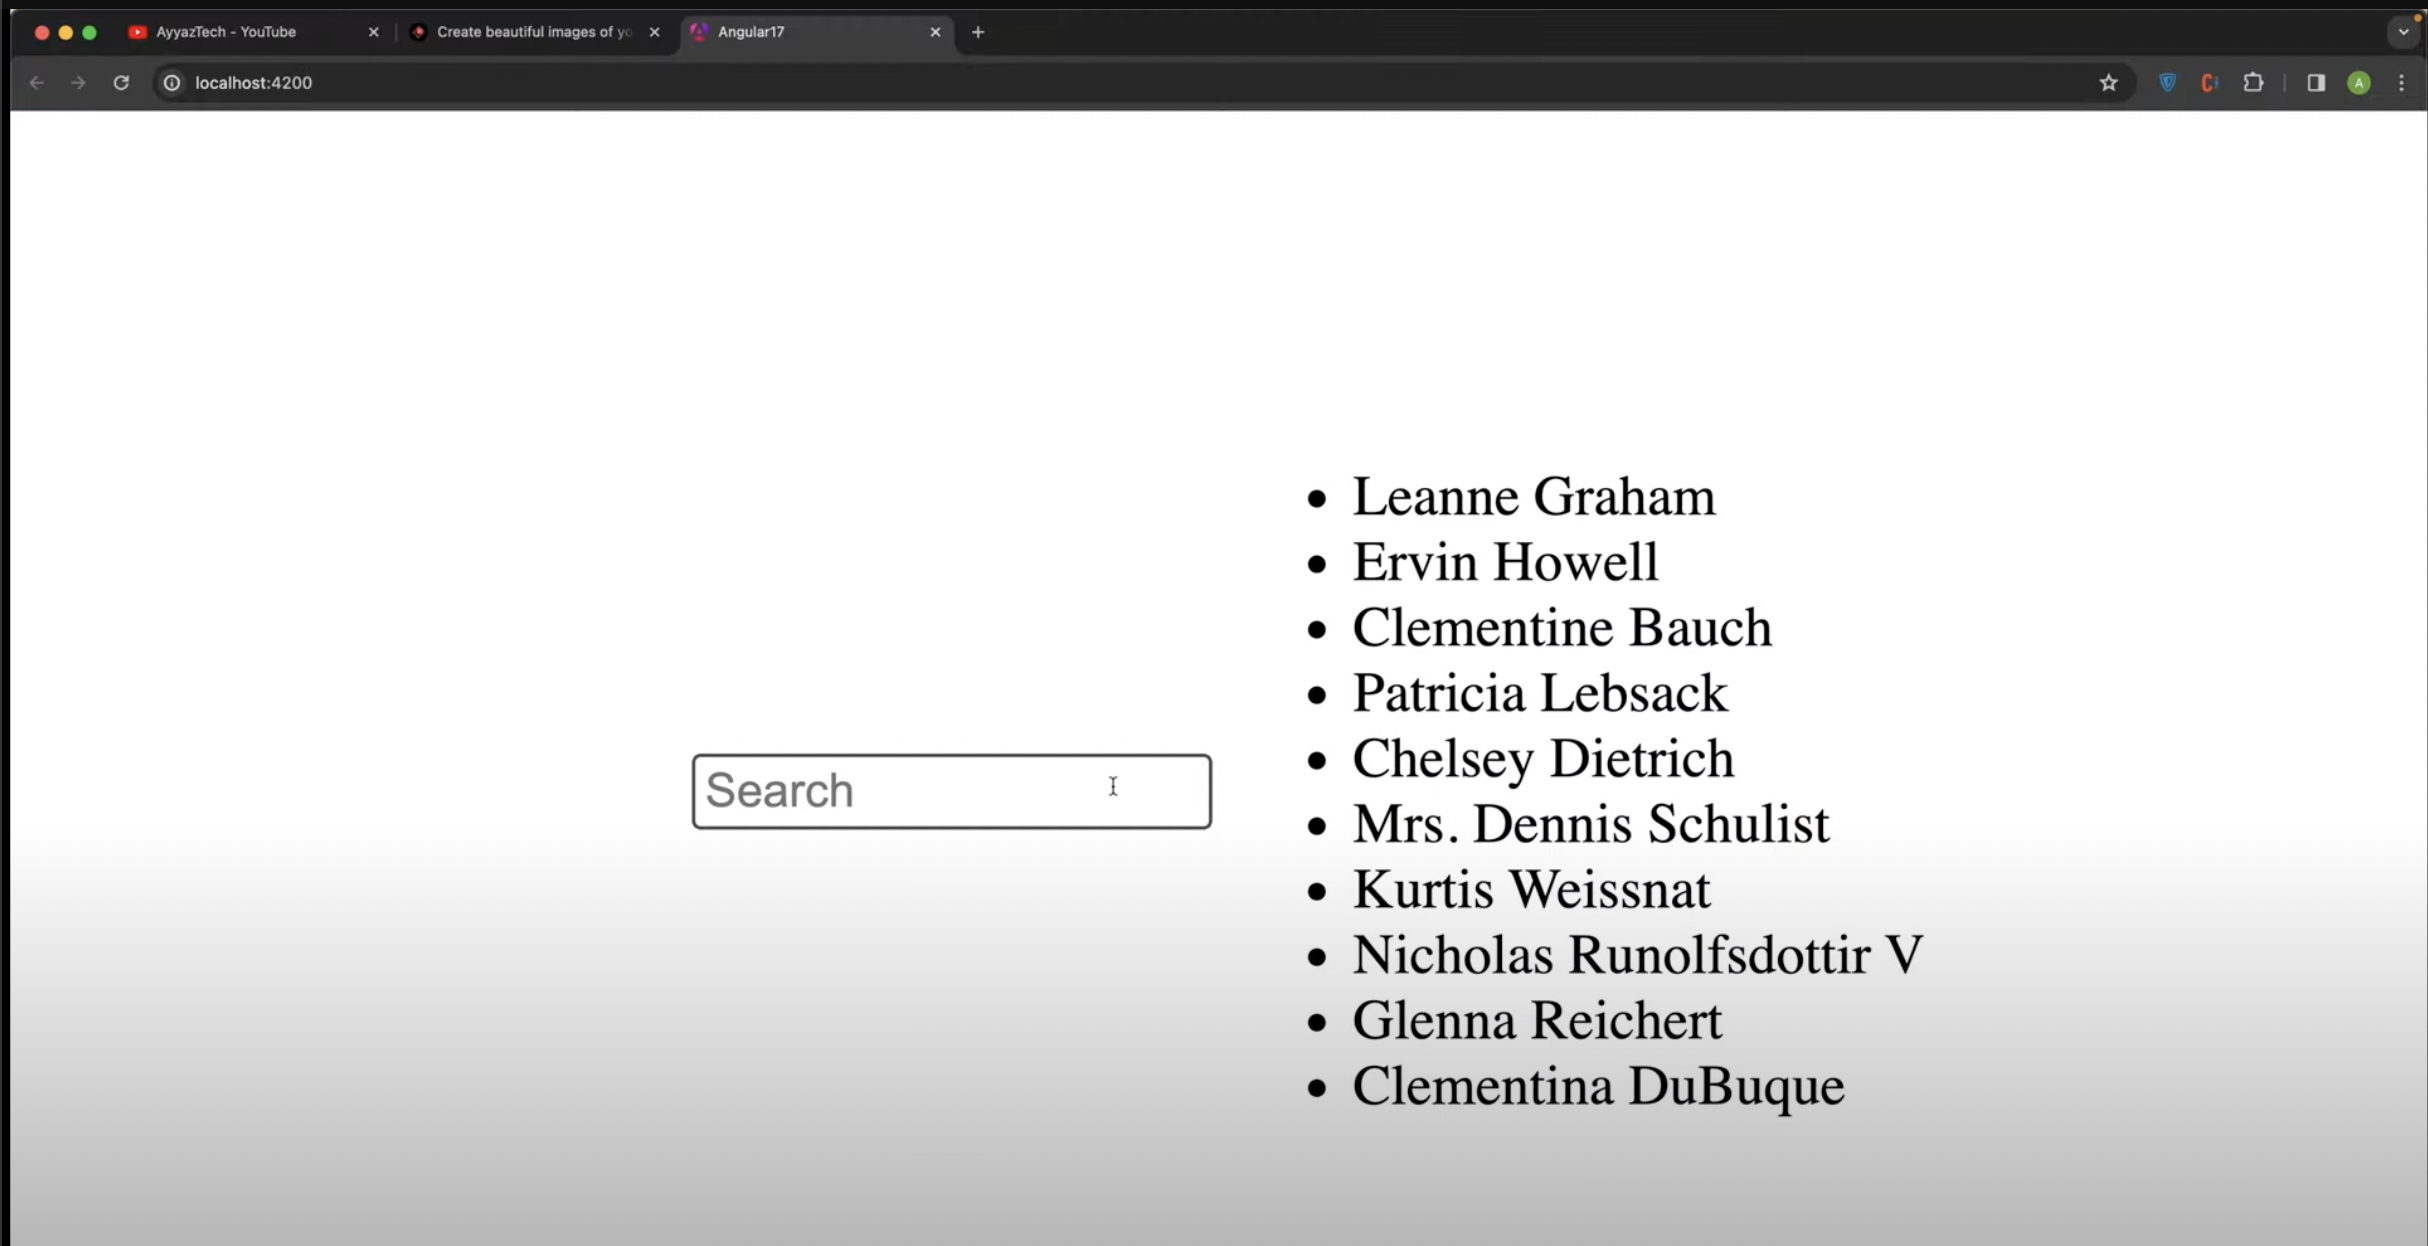
5. Real-Time Search and Filtering
Angular's reactive forms and RxJS operators are incredibly useful tools for creating efficient and responsive search features in your applications. To implement a real-time data search feature, you can use FormControl combined with RxJS operators such as debounceTime, distinctUntilChanged, and switchMap.
In the following example code, we created property flteredItems$ that will hold an observable from the response of the .pipe() function.
We are basically accessing the valueChanges property from the searchControl that is actually RXjs observable. And we can always call the pipe function on any observable.
So in that pipe function we are passing 3 different operators (debounceTime, distinctUntilChanged and switchMap). All of these operators have their own logic that they will perform before subscribing to this observable.
import { FormControl } from "@angular/forms";
import { debounceTime, distinctUntilChanged, switchMap } from "rxjs/operators";
import { HttpClient } from "@angular/common/http";
import { inject } from "@angular/core";

export class AppComponent {

  http = inject(HttpClient);

  searchControl = new FormControl();
  filteredItems$ = this.searchControl.valueChanges.pipe(
    debounceTime(300),
    distinctUntilChanged(),
    switchMap((term) =>this.filterItems(term))
  );

  filterItems(searchTerm: string) {
    return this.http.get(`https://jsonplaceholder.typicode.com/users?q=${searchTerm}`);
  }
}
The debounceTime ensures that API requests are not made excessively, improving performance, while distinctUntilChanged avoids repeated requests when the search term doesn’t change.
The switchMap operator is used to switch to a new observable whenever the search term changes, ensuring that only the latest API request is processed. This helps to prevent older, unnecessary requests from interfering, which is particularly useful in scenarios like live search, where the user is actively typing.
Now let's add the input type text in the html file of our component to connect with searchControl property.
<input type="text" [formControl]="searchControl" placeholder="Search" />

<ul>
  <li *ngFor="let item of items">
    {{ item.name }}
  </li>
</ul>
6. Error Handling & Optimizing API Requests
Optimizing API calls and handling errors is essential. When dealing with external APIs, errors may occur, and it's important to ensure your application can handle them gracefully. Use the catchError operator from RxJS to manage these errors.
 import { catchError } from 'rxjs/operators';
import { of } from 'rxjs';

fetchData() {
  this.http.get('https://jsonplaceholder.typicode.com/users').pipe(
    catchError((error) => {
      console.error('Error fetching data:', error);
      return of([]); // return empty array to keep app running smoothly
    })
  ).subscribe((data) => {
    this.items = data;
  });
}
Using the catchError operator ensures that even if the API fails, the application continues to work smoothly, and you can provide feedback to the user as needed. This level of error handling is critical for maintaining a professional and user-friendly application.
Conclusion
Congratulations! You've now learned the essentials of binding data in Angular using APIs. We've covered setting up Angular, importing and using the HTTP client, binding API data, implementing real-time search, and handling errors to ensure a seamless experience for both developers and users.
If you found this guide helpful, make sure to watch our YouTube tutorial and subscribe to our channel for more Angular and web development tips. In the video, you’ll get a hands-on demonstration of the entire process, complete with examples and explanations that make understanding easy and enjoyable.
Feel free to comment with questions on youtube video or share how you used these techniques in your projects. We can't wait to see what you build! Don't forget to explore different APIs and experiment with various forms of data binding and event handling. The possibilities are endless!
Until next time, happy coding!